Plugin Compatibility
The plugin WooCommerce Variation Gallery is compatible with most WordPress \ WooCommerce templates that use the standard WooCommerce functionality to display images on the product page.
Below is a list of popular WooCommerce themes that the WooCommerce Variation Gallery plugin is compatible with:
- Twenty Twenty-Five – By WordPress team
- Twenty Twenty-Four – By WordPress team
- Twenty Twenty-Three – By WordPress team
- Storefront – By Automattic
- WoxStore – By CozyThemes
- Astra – By Brainstorm Force
- Botiga – By aThemes
- Neve – By ThemeIsle
- Rife Free – By Apollo13Themes
- Th Shop Mania – By ThemeHunk
- Inspiro – By WPZOOM
- Overlay – By Kaira
- Tyche – By Colorlib
- Spacious – By ThemeGrill
- Allegiant – By CPOThemes
- Dazzling – By Colorlib
- Fashion Diva – By Blossom Themes
- Di eCommerce – By dithemes
- Easy Store – By Mystery Themes
- Shopay – By Mystery Themes
- eCommerce Gem – By ProDesigns
- ShoppingCart – By Theme Freesia
- Shopstar! – By Out the Box
- Own Shop – By Spiracle Themes
- VW Ecommerce Store – By VW Themes
- Excellent – By Theme Freesia
- Product Comparison Woocommerce – By VWThemes
- Shoppable Style – By Bosa Themes
System Requirements
For optimal performance, your server should meet the following requirements:
- WordPress Version: 6.7.2 or greater
- PHP version 7.4 or greater
- MySQL version 8.0 or greater OR MariaDB version 10.4 or greater
- HTTPS support
- Apache or Nginx are the most robust options for running WordPress
WordPress Installation
Here’s the quick version of the instructions for those who are already comfortable with performing such installations:
- Download and unzip the WordPress package if you haven’t already.
- Create a database for WordPress on your web server, as well as a MySQL (or MariaDB) user who has all privileges for accessing and modifying it.
- (Optional) Find and rename
wp-config-sample.phptowp-config.php, then edit the file (see Editing wp-config.php) and add your database information. Note: If you are not comfortable with renaming files, step 3 is optional and you can skip it as the install program will create the wp-config.php file for you. - Upload the WordPress files to the desired location on your web server:
- If you want to integrate WordPress into the root of your domain (e.g. https://example.com/), move or upload all contents of the unzipped WordPress directory (excluding the WordPress directory itself) into the root directory of your web server.
- If you want to have your WordPress installation in its own subdirectory on your website (e.g. https://example.com/blog/), create the blog directory on your server and upload the contents of the unzipped WordPress package to the directory via FTP.
- Note: If your FTP client has an option to convert file names to lower case, make sure it’s disabled.
- Run the WordPress installation script by accessing the URL in a web browser. This should be the URL where you uploaded the WordPress files.
– If you installed WordPress in the root directory, you should visit: https://example.com/
– If you installed WordPress in its own subdirectory called blog, for example, you should visit: https://example.com/blog/
That’s it! WordPress should now be installed.
More detailed instructions follow this link: WordPress Installation
Download WooCommerce Variation Gallery Pro
- After purchasing the plugin, you need to log in to My Account

- Then to Orders
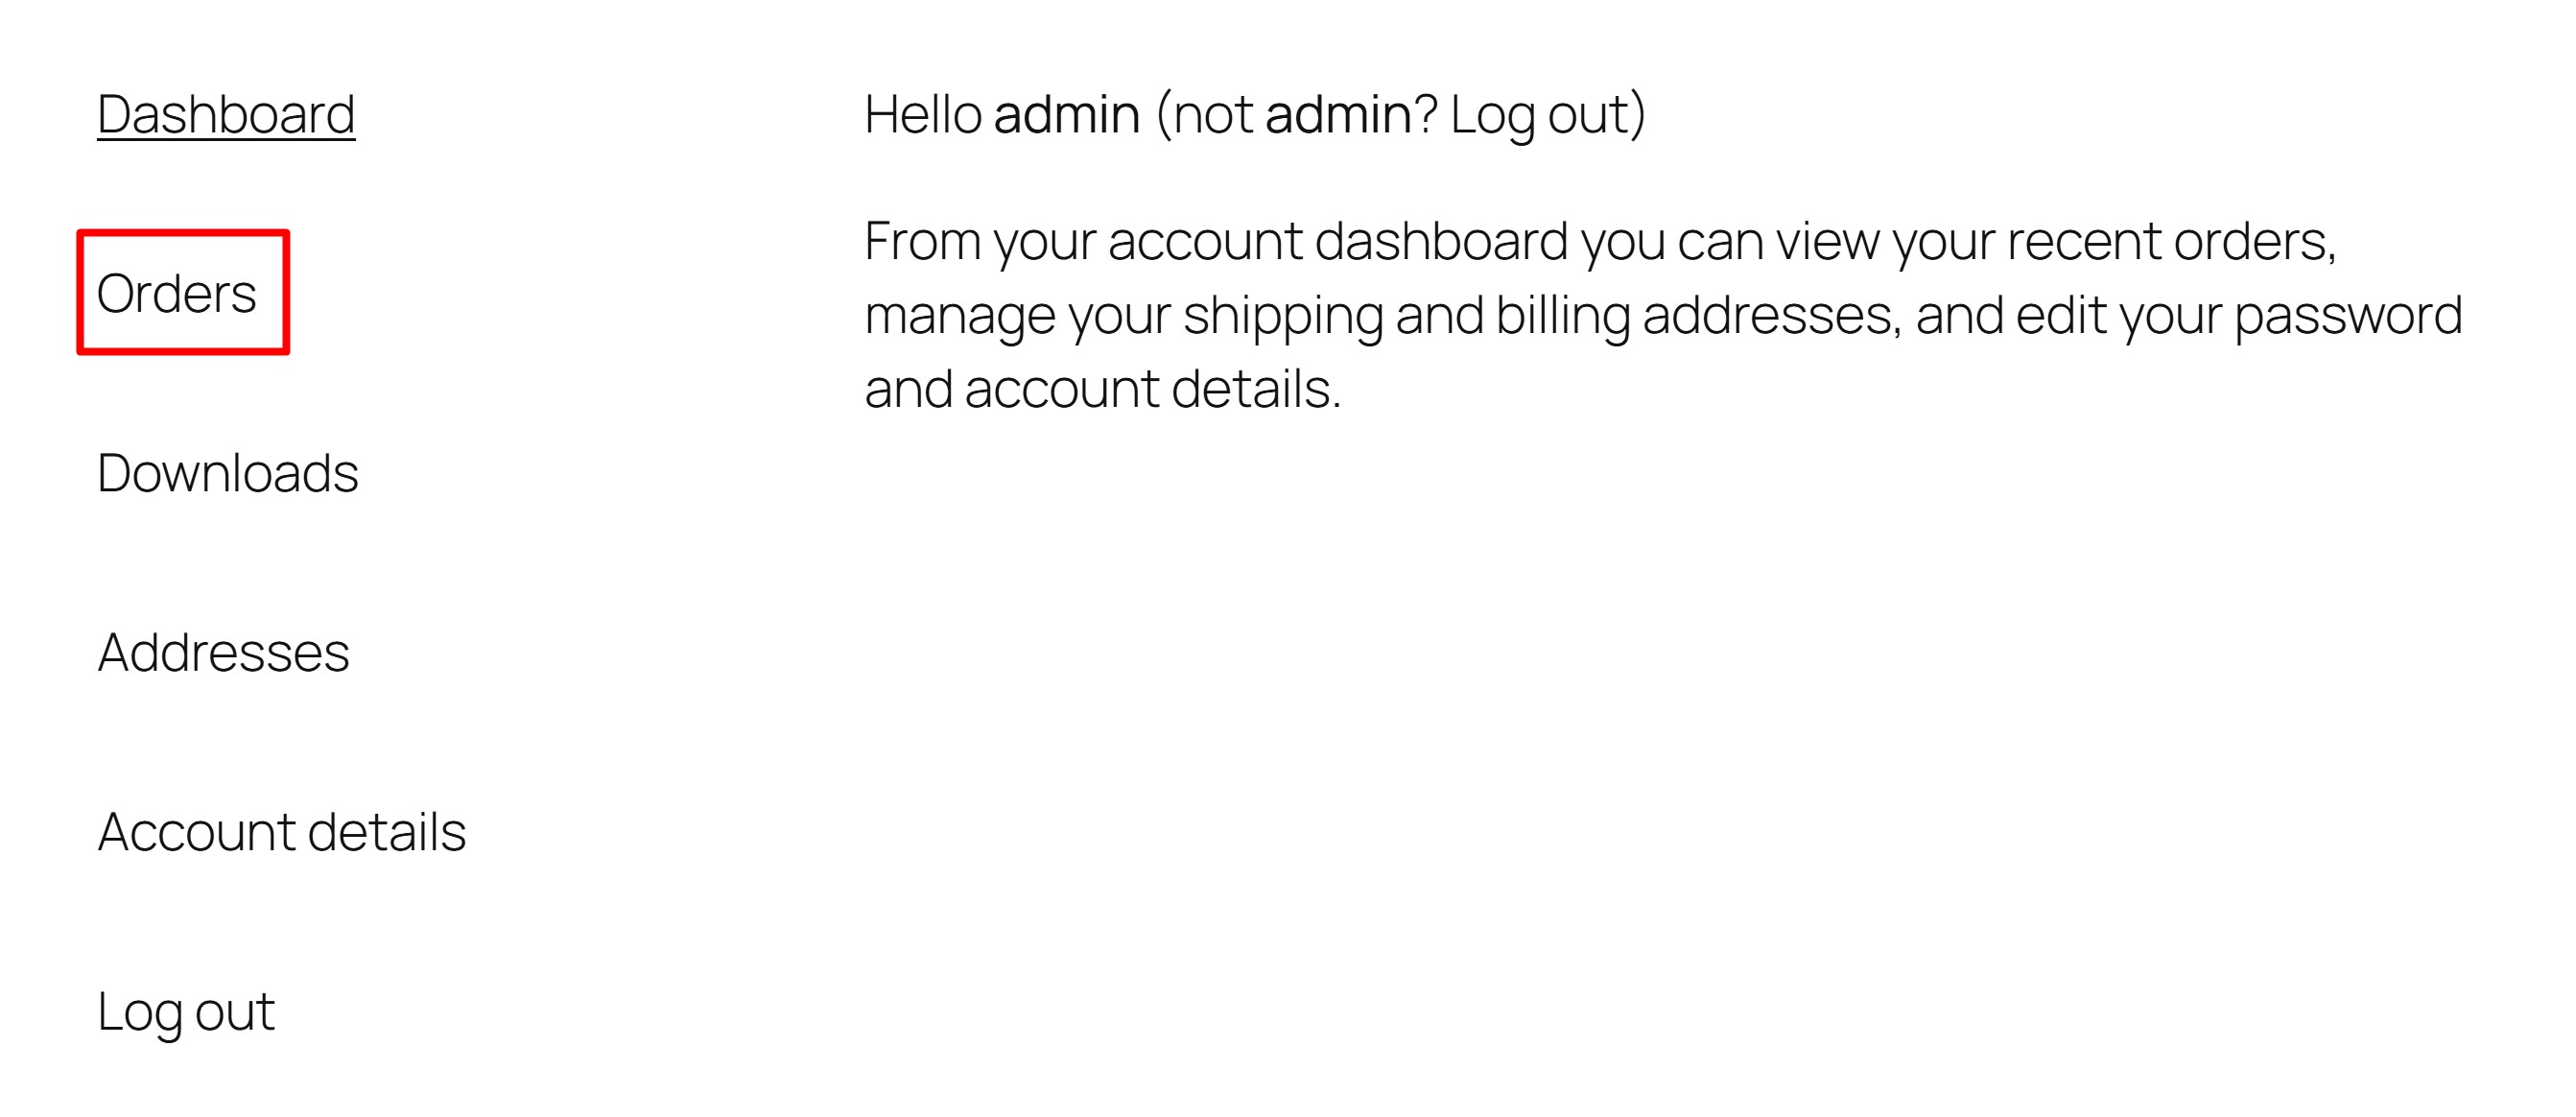
- In Orders , you need to find the corresponding order and open it.
- In the Downloads section, find the Download column and click on the link below it, from where you can download the WooCommerce Variation Gallery Pro plugin.
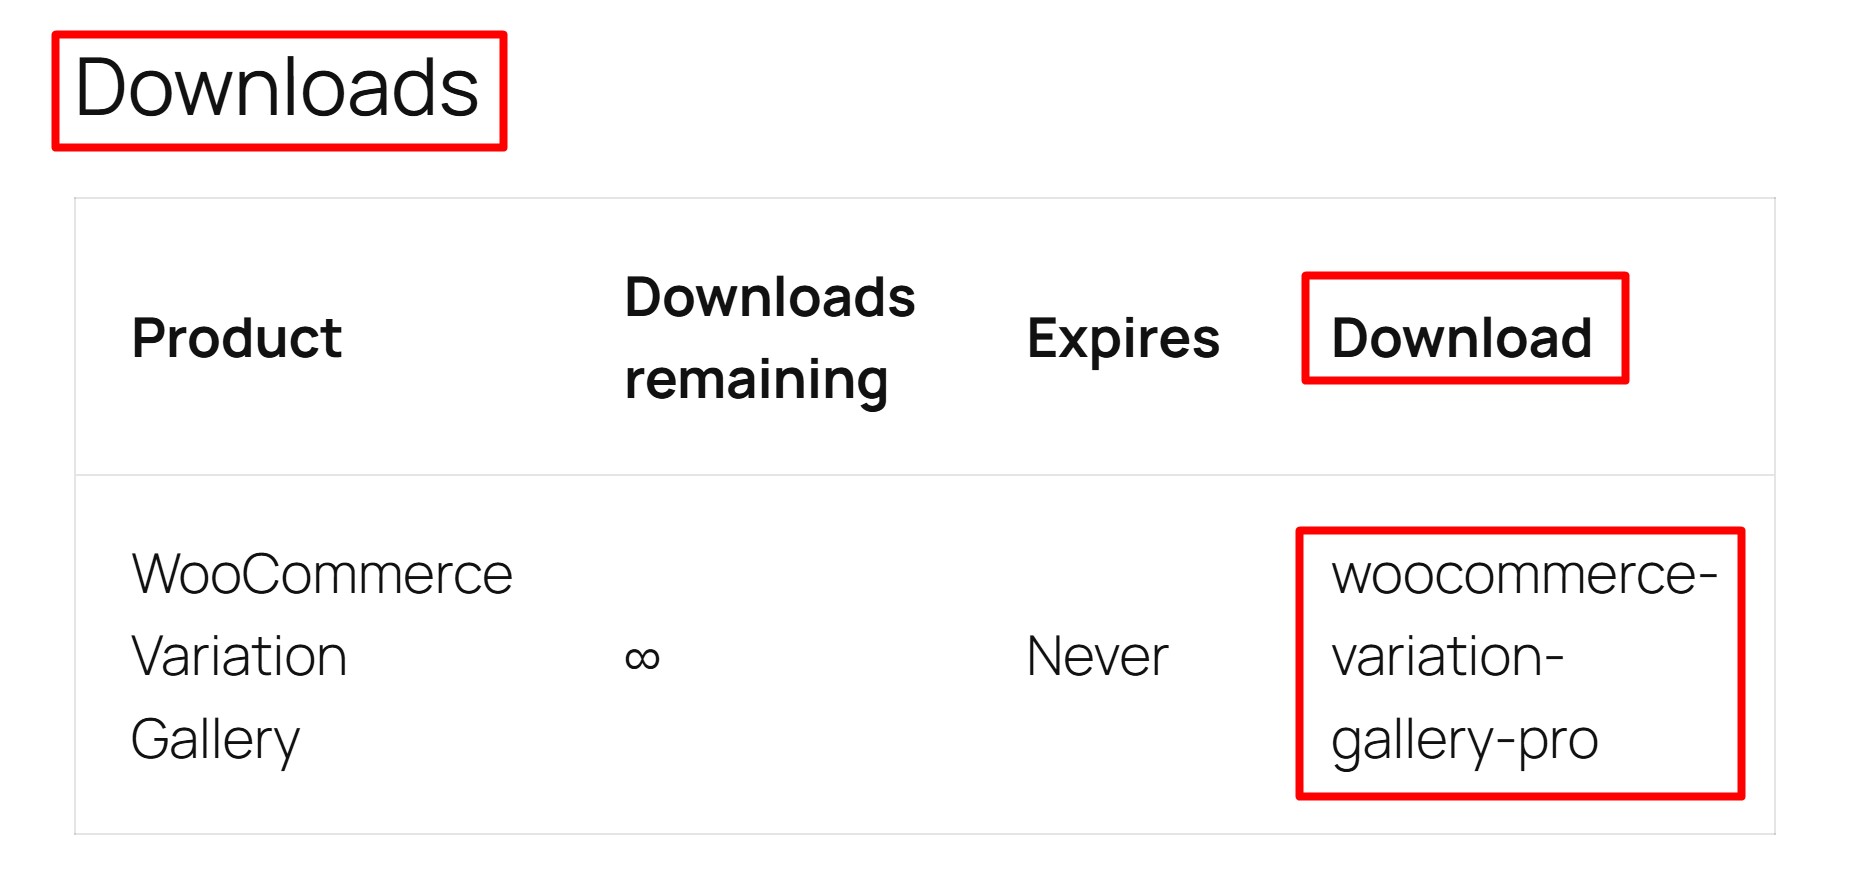
The downloaded file WooCommerce Variation Gallery Pro will be in .zip format. Then you need to install this file in your WordPress site’s plugins.
Plugin Installation
- Log in to the WordPress Administration Panels.
- Select the Plugins in panel.
- Select Add Plugin.
- Click to Upload Plugin .
- Select Choose File (The plugin will be in .zip format which you will need to specify for installation).
- Click to Install Now button.
Plugin Functionality
After installing the plugin, a button to access the “WooCommerce Variation Gallery Pro” settings page will appear in the menu panel on the left side of your WordPress admin panel.
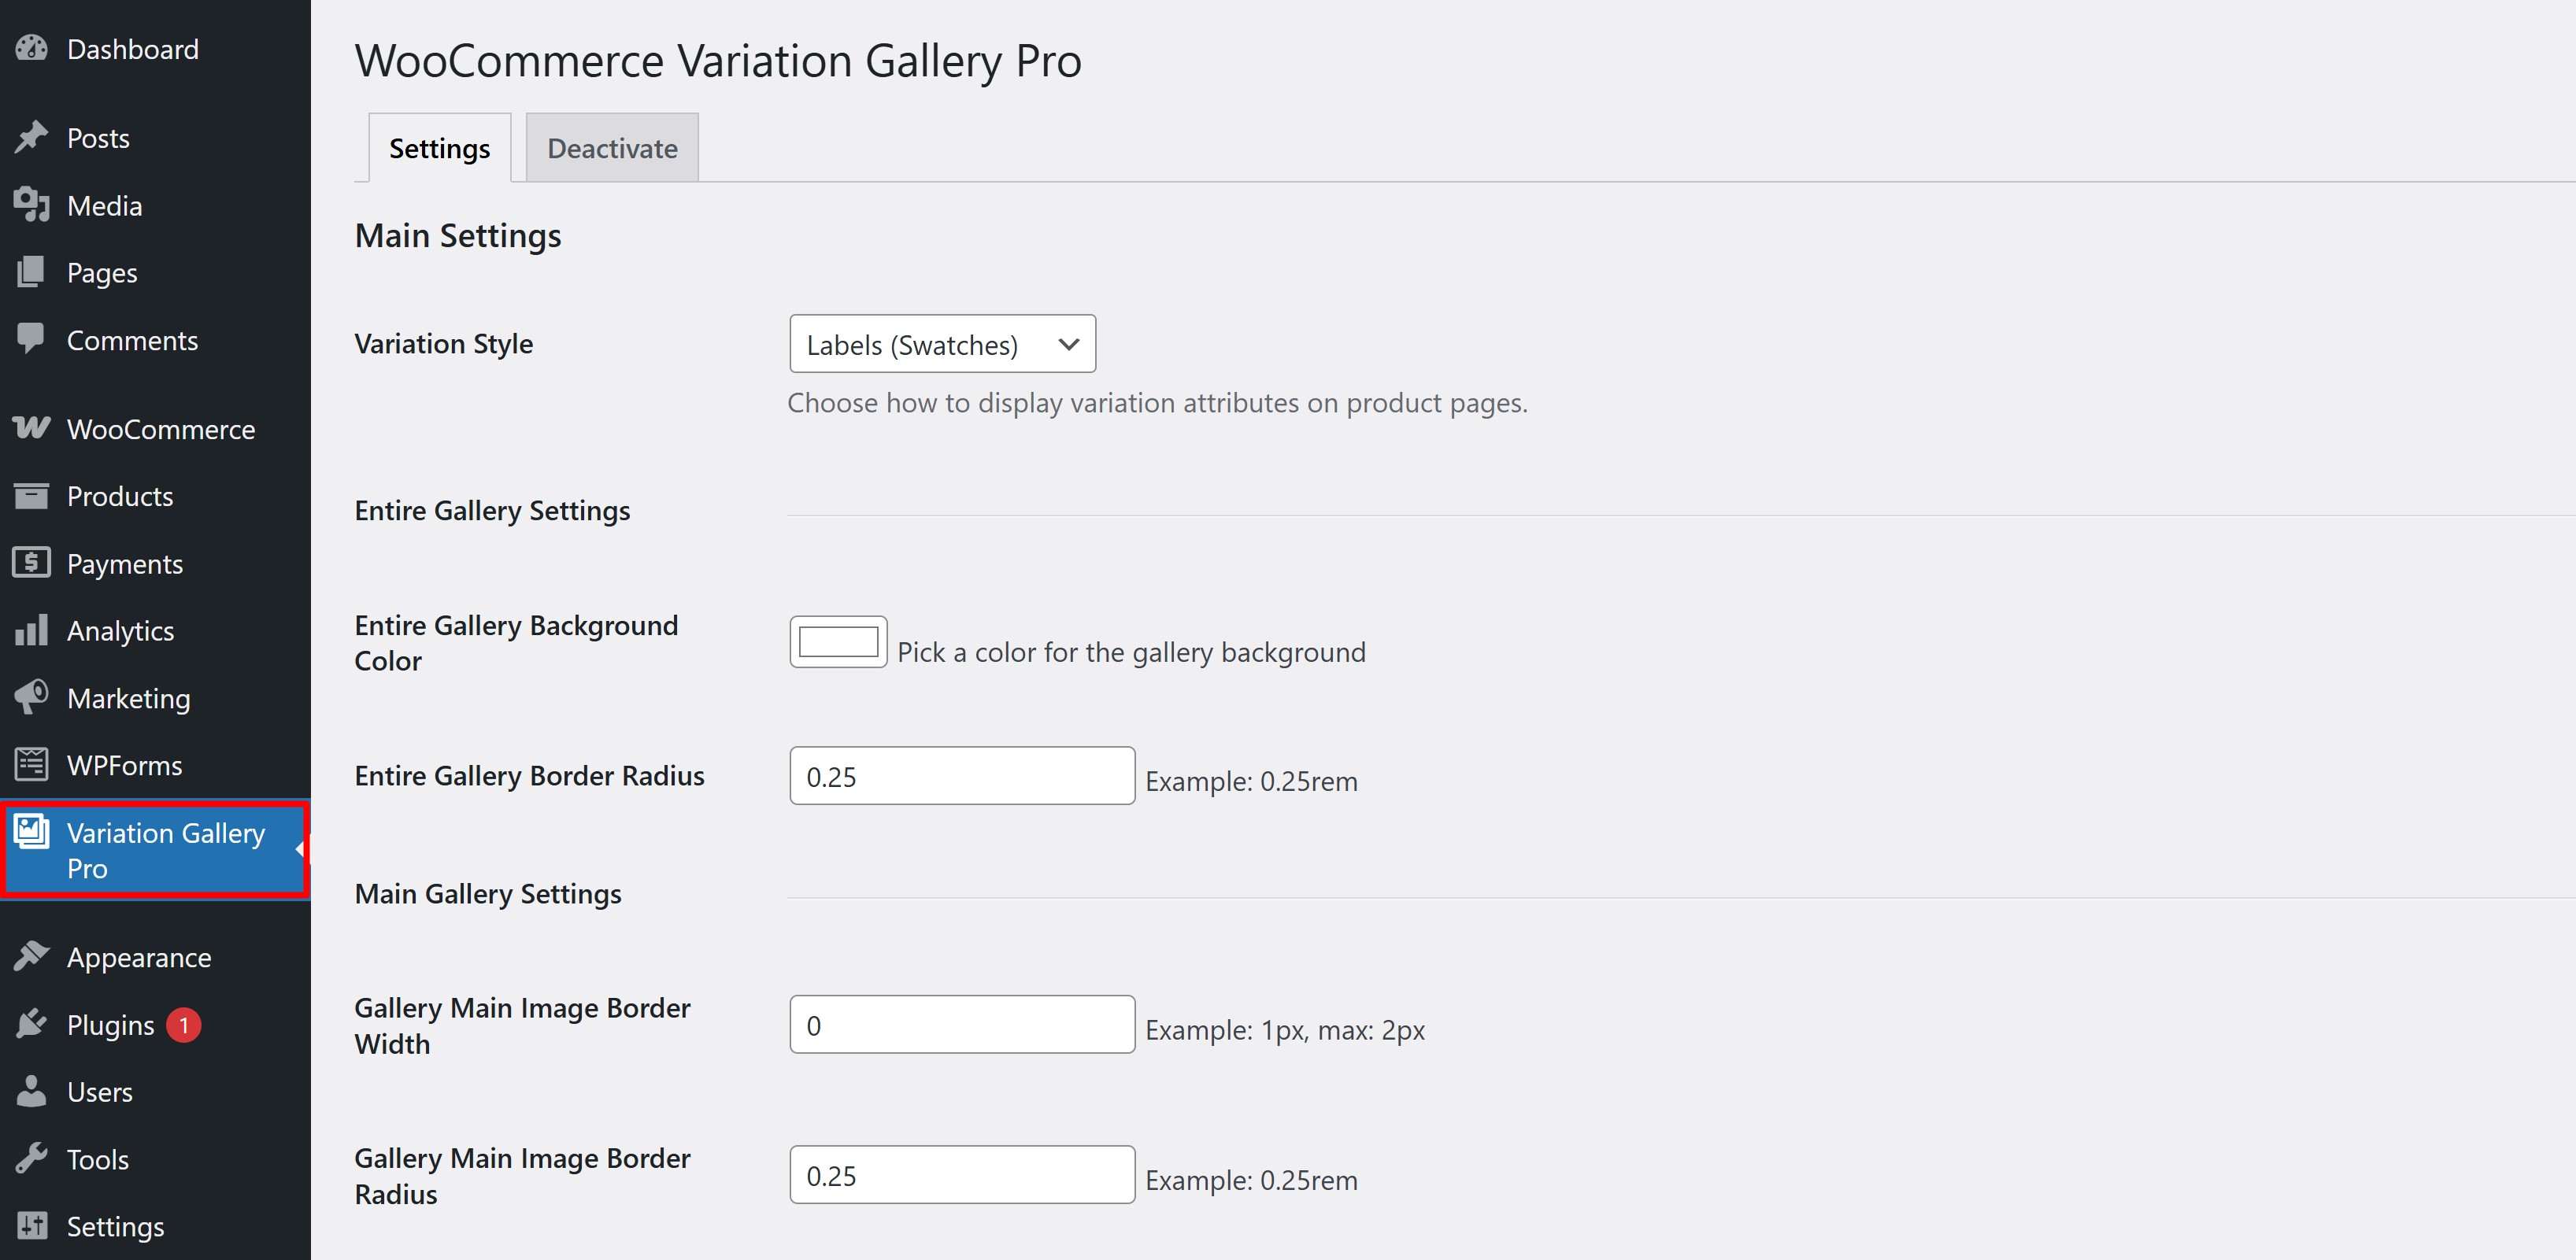
Here is a list of the plugin’s features that will help you configure it:
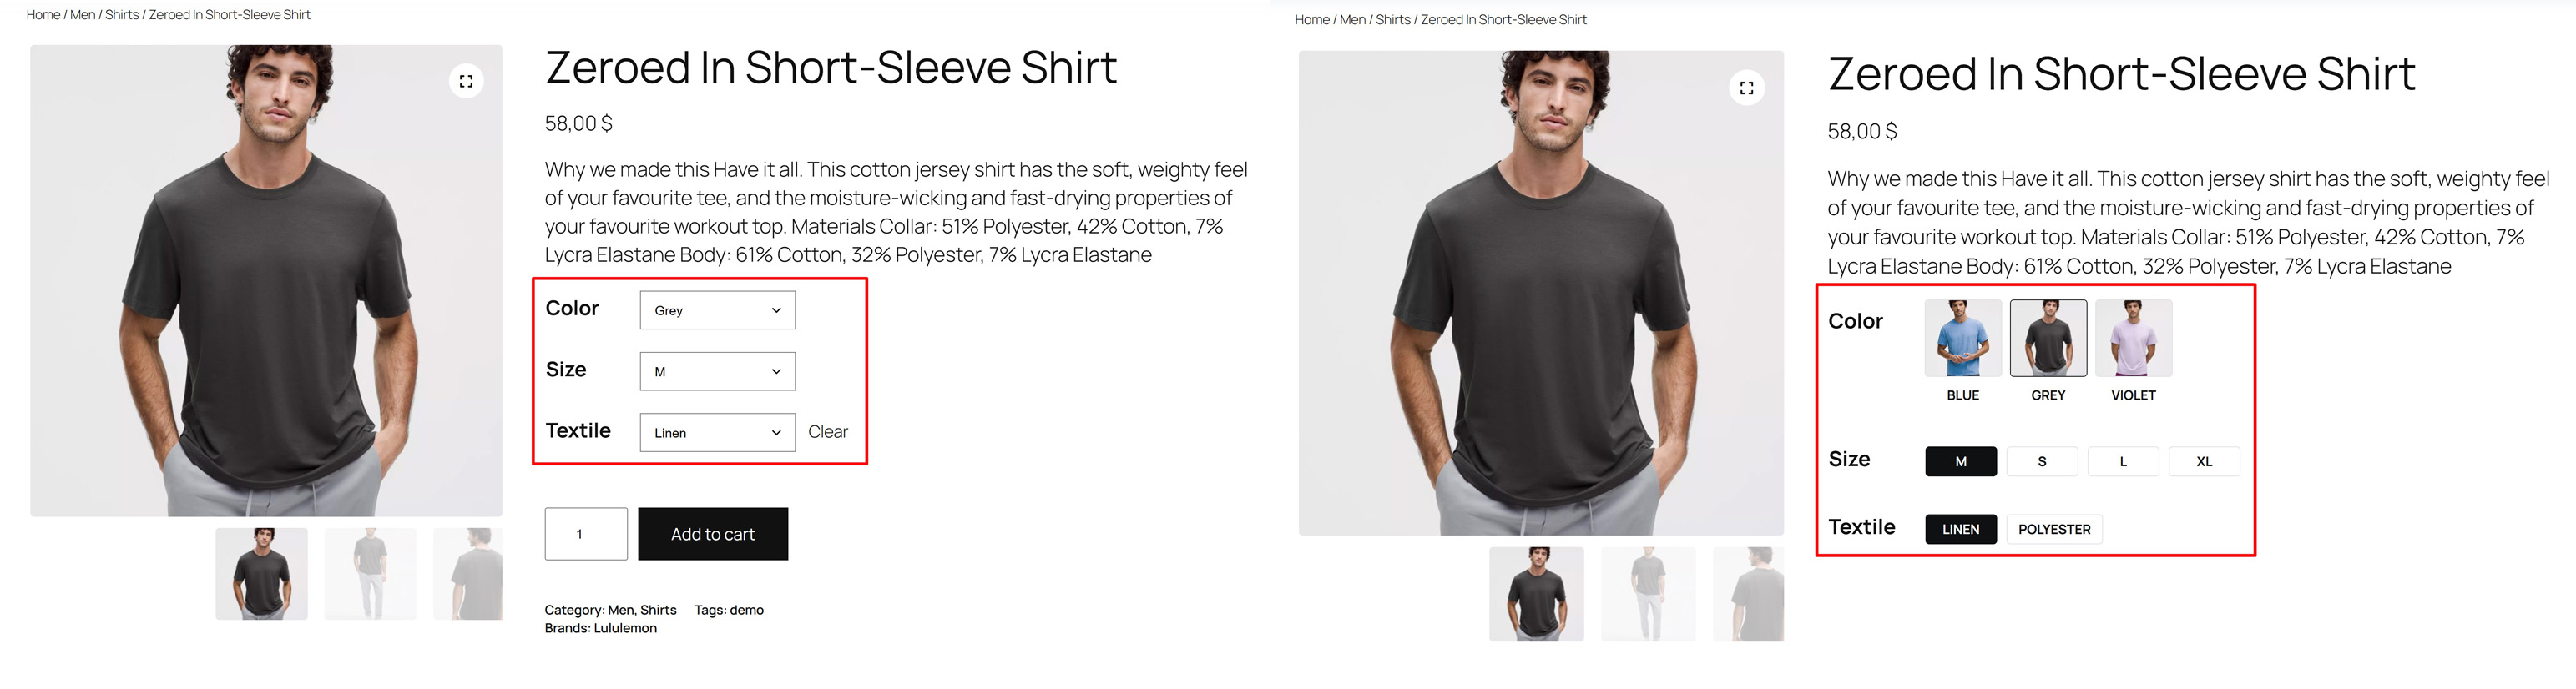
- Variation Style – From here, you can choose whether the product variation toggle is a standard selectbox or labels.
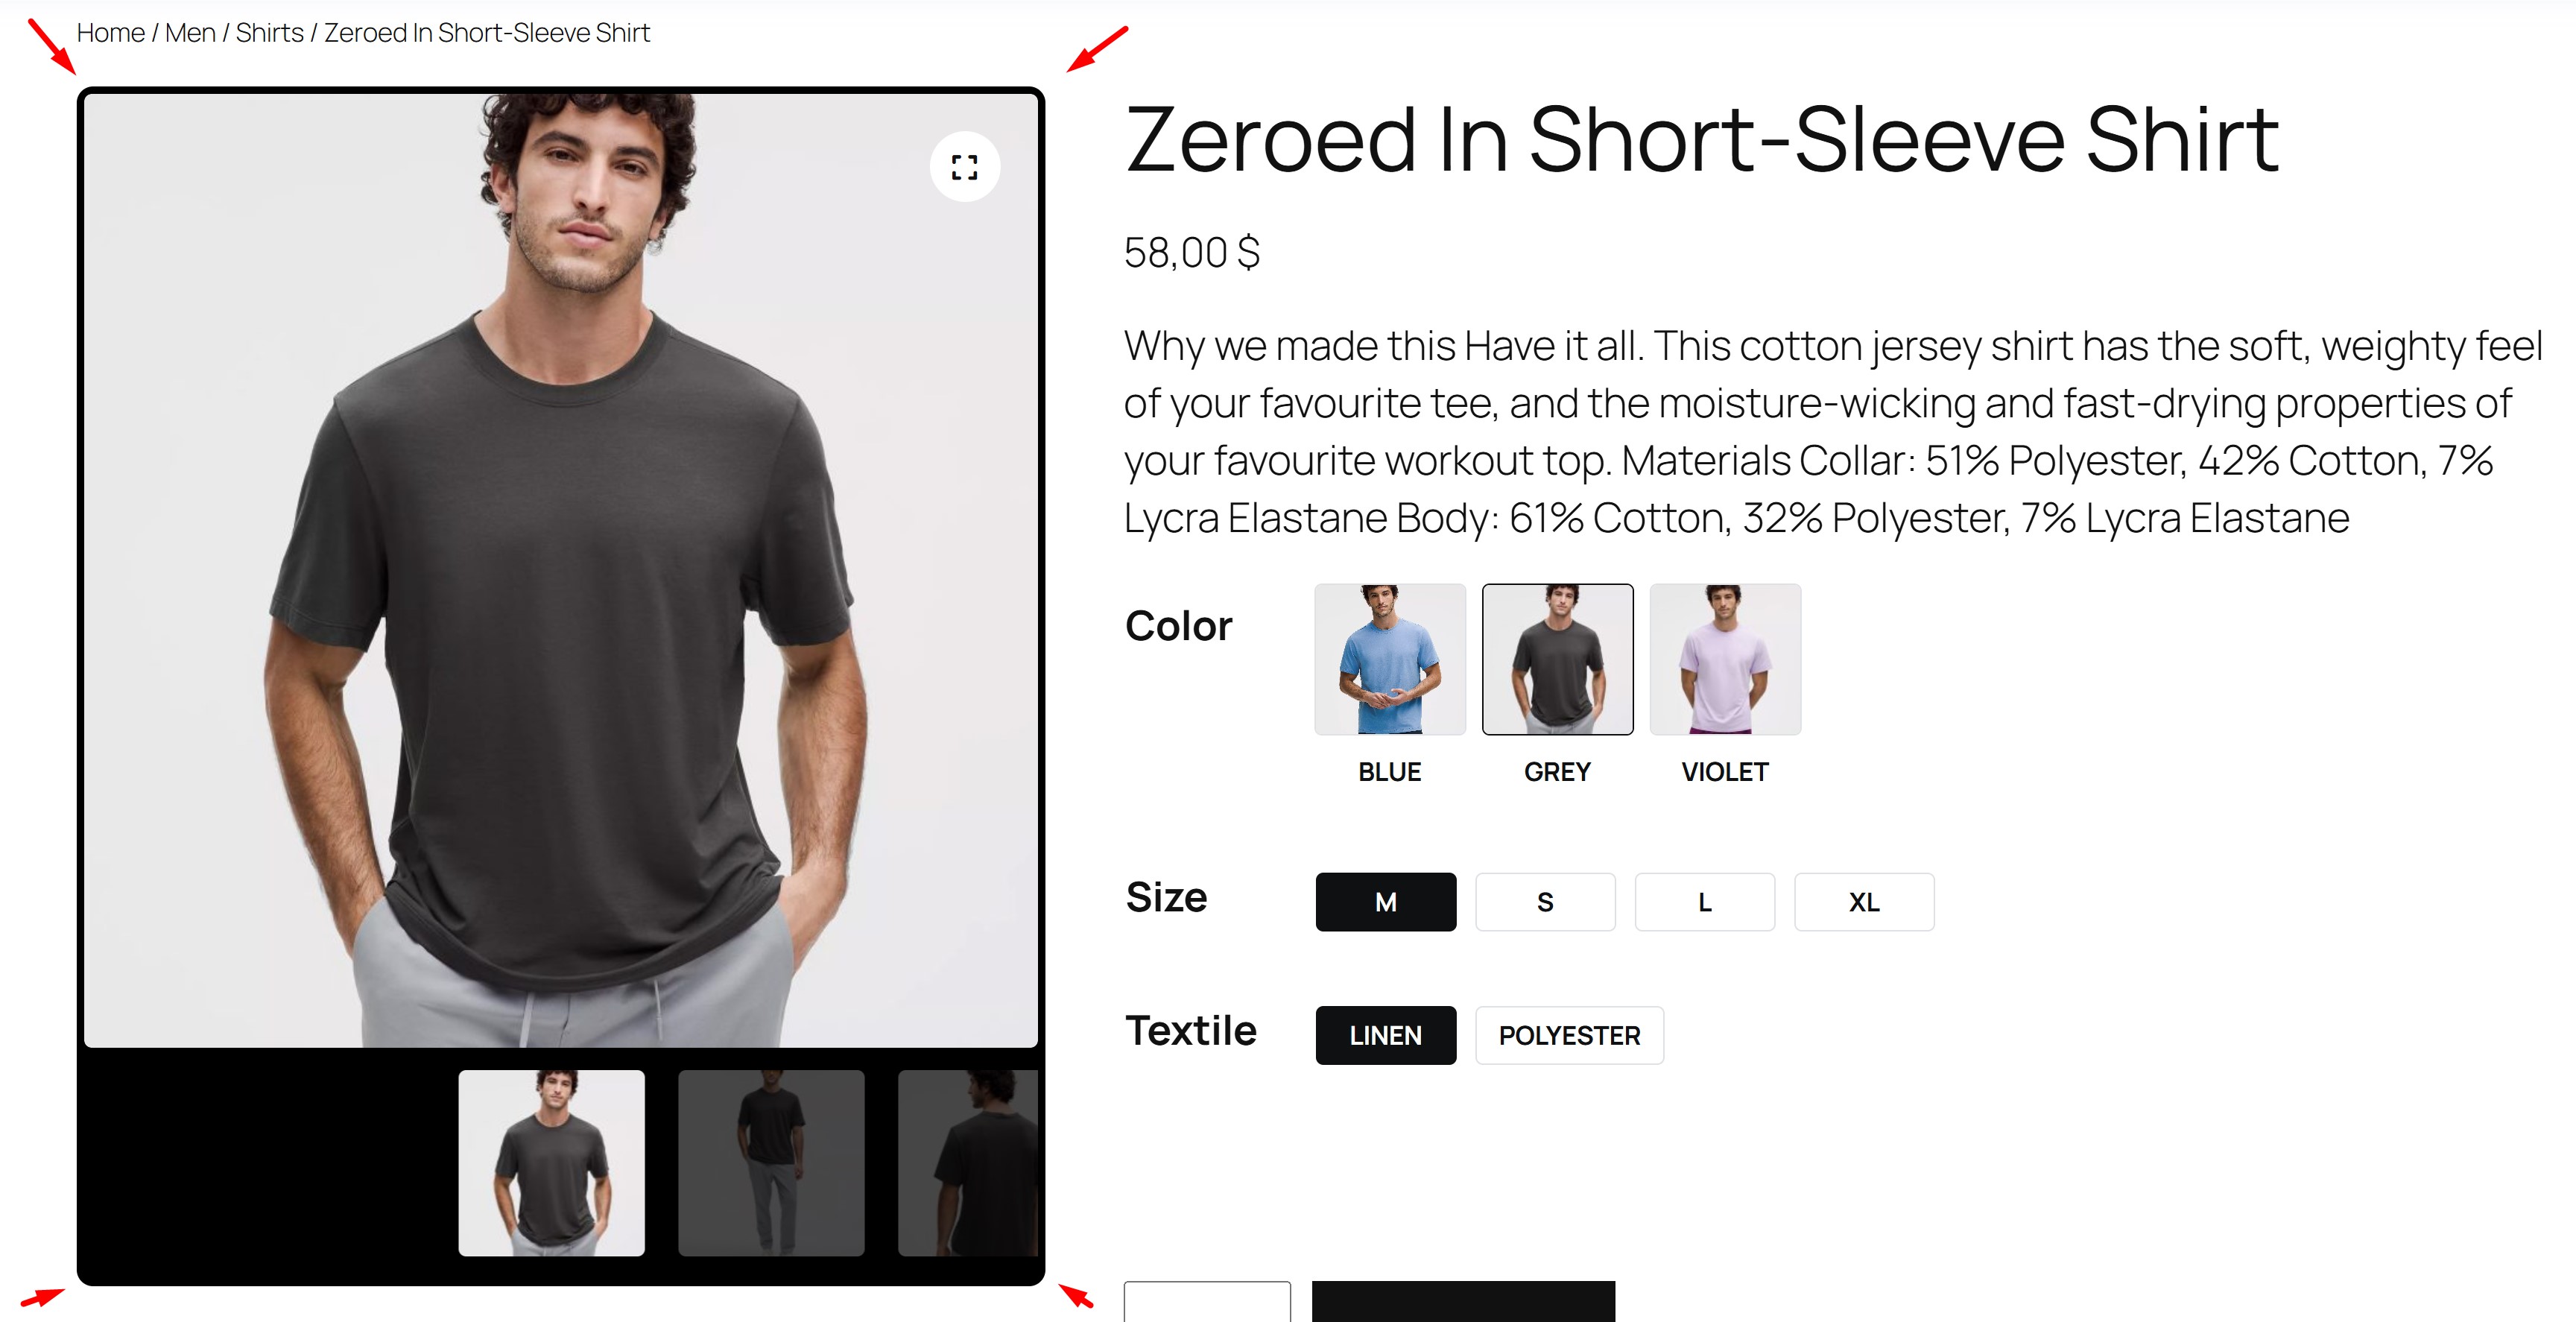
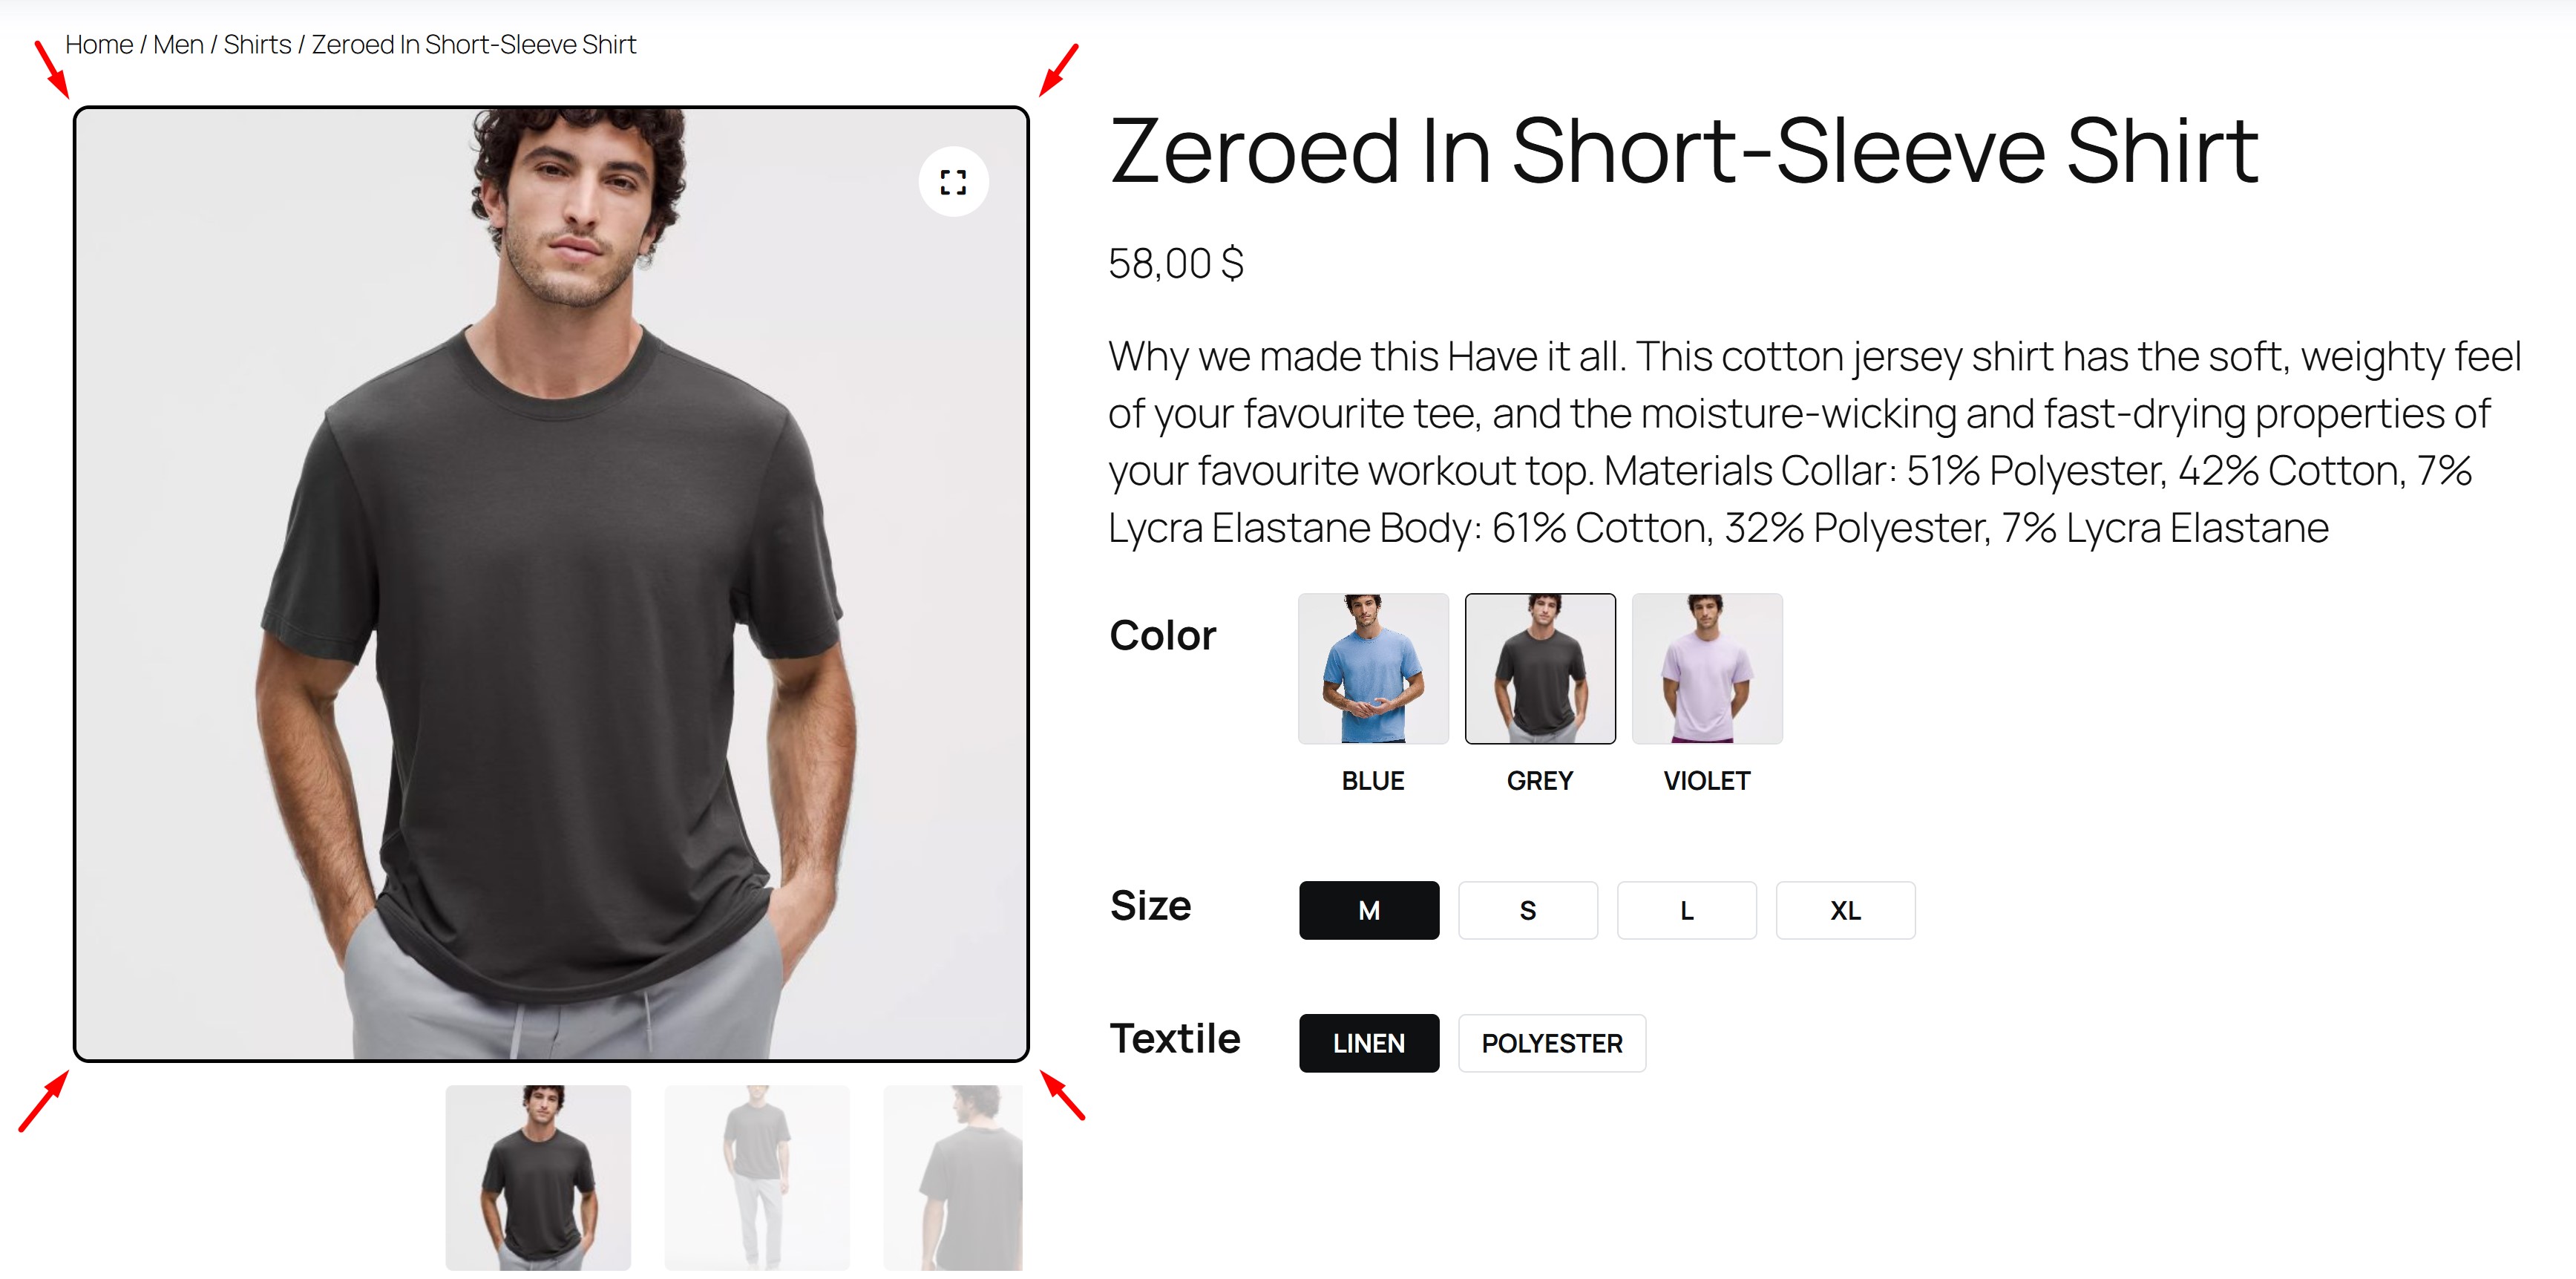
- Entire Gallery Background Color – From here you can define the background color of the entire gallery
- Entire Gallery Border Radius – From here you can set the Border Radius for the entire gallery
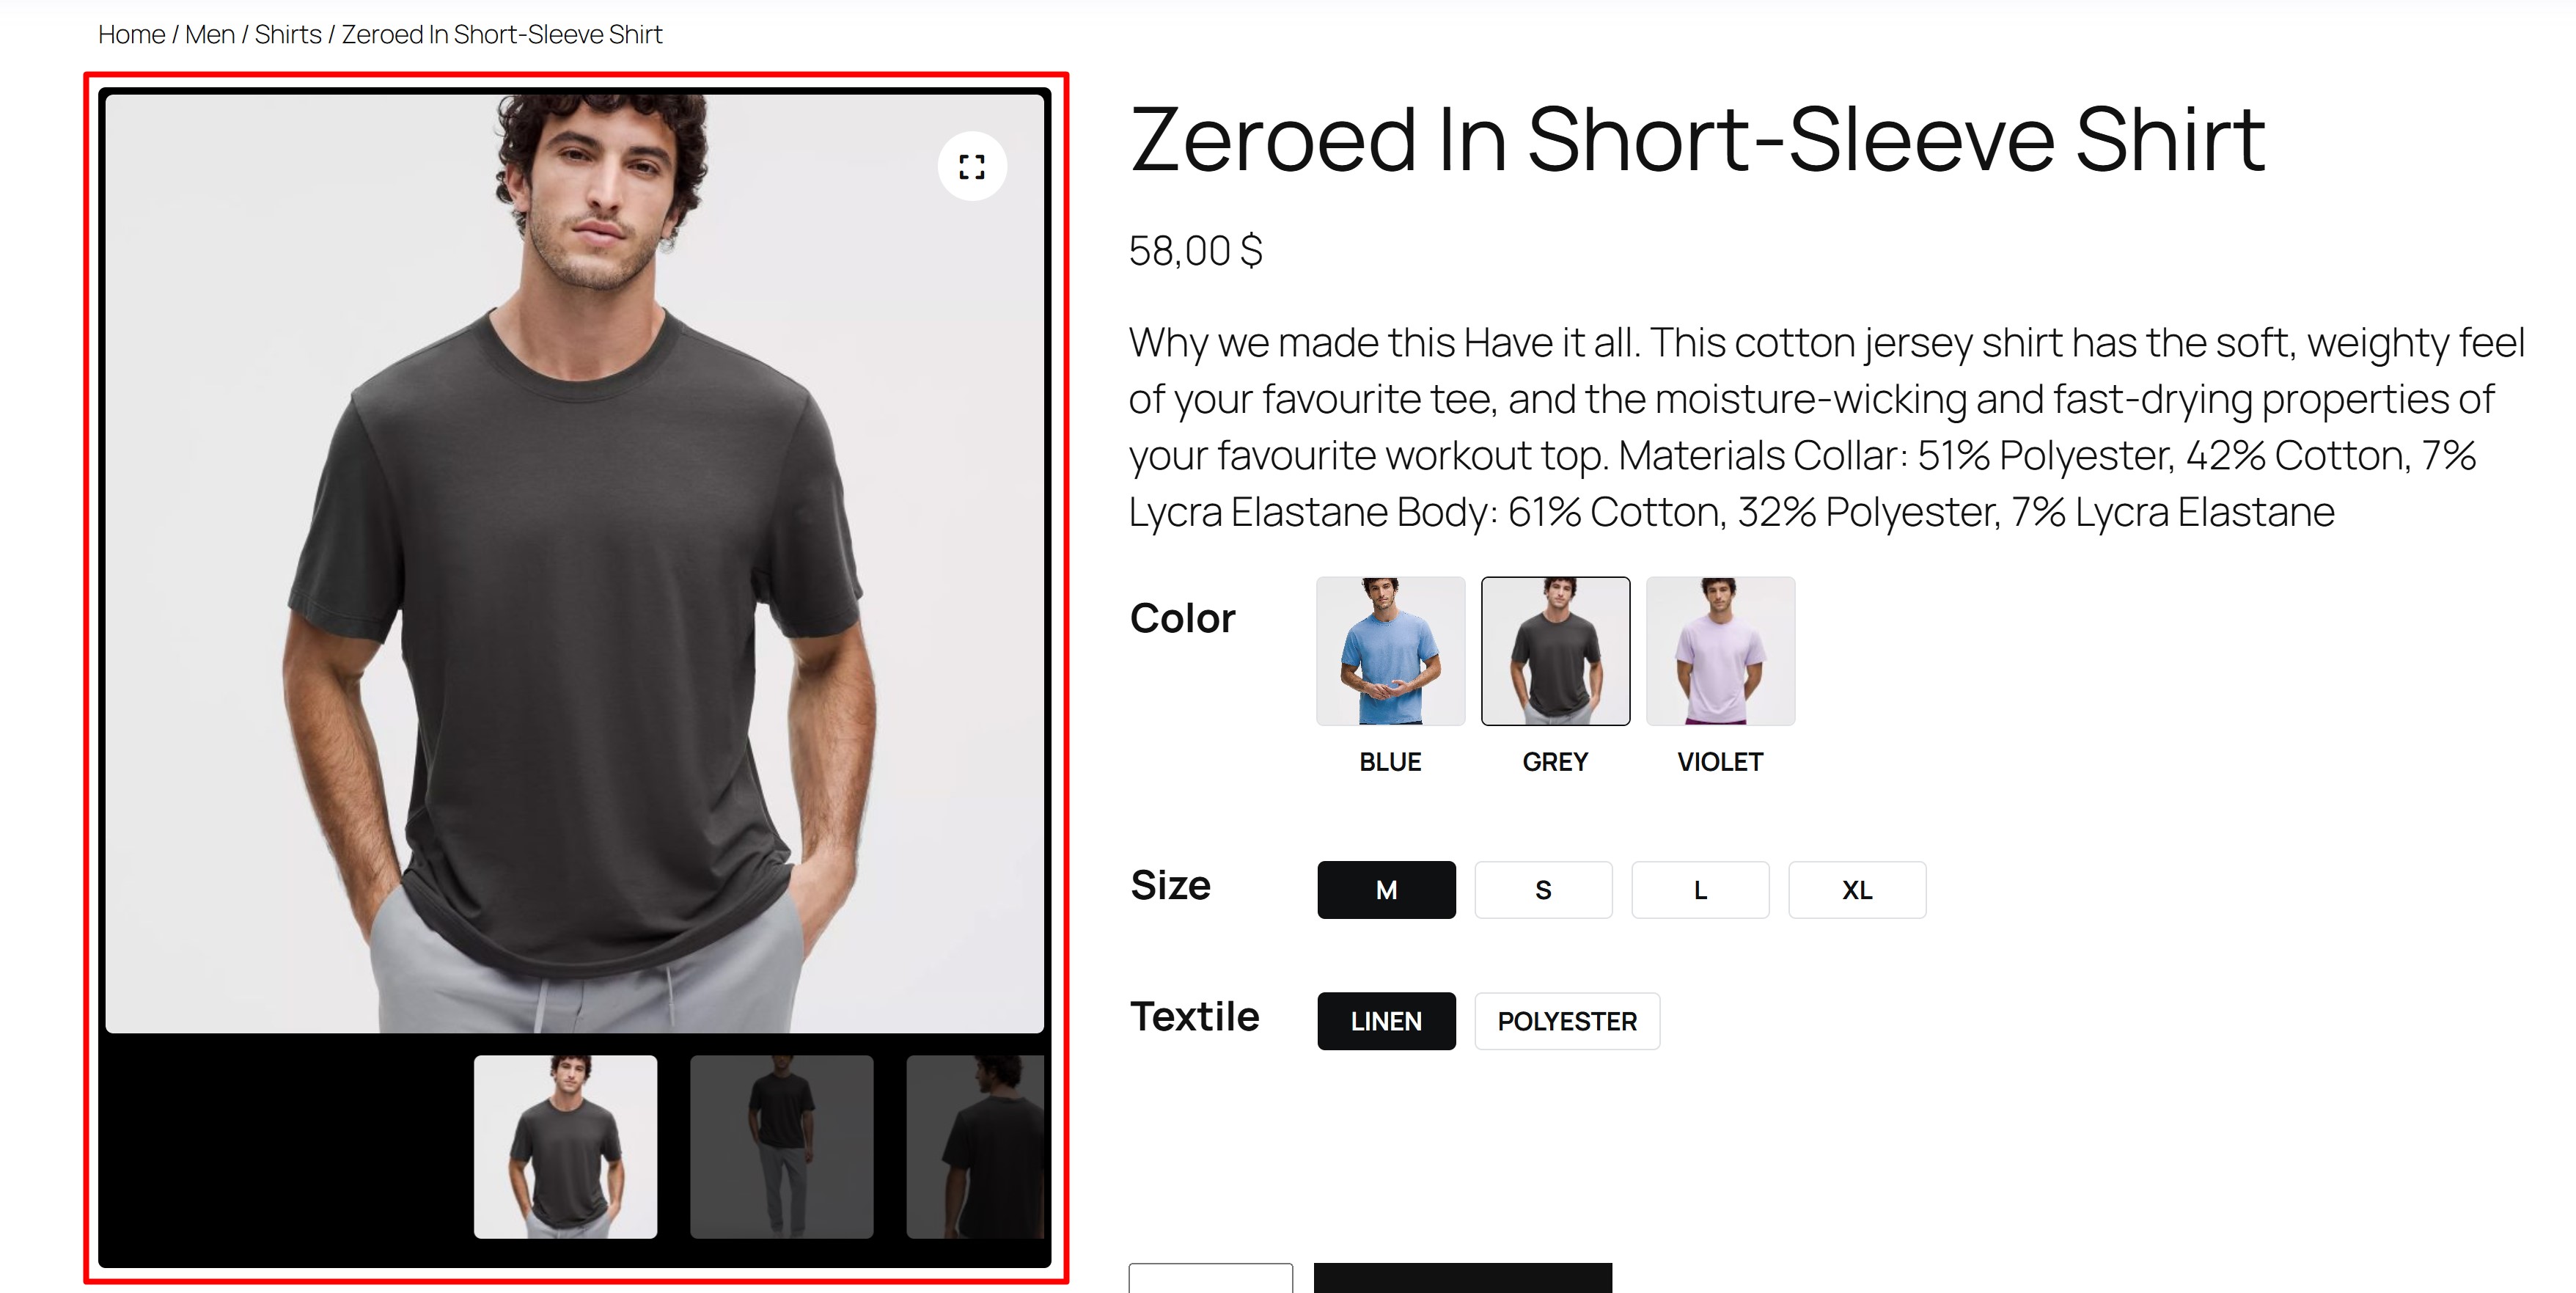
- Gallery Main Image Border Width – From here you can set the Border Width for the main image in the gallery
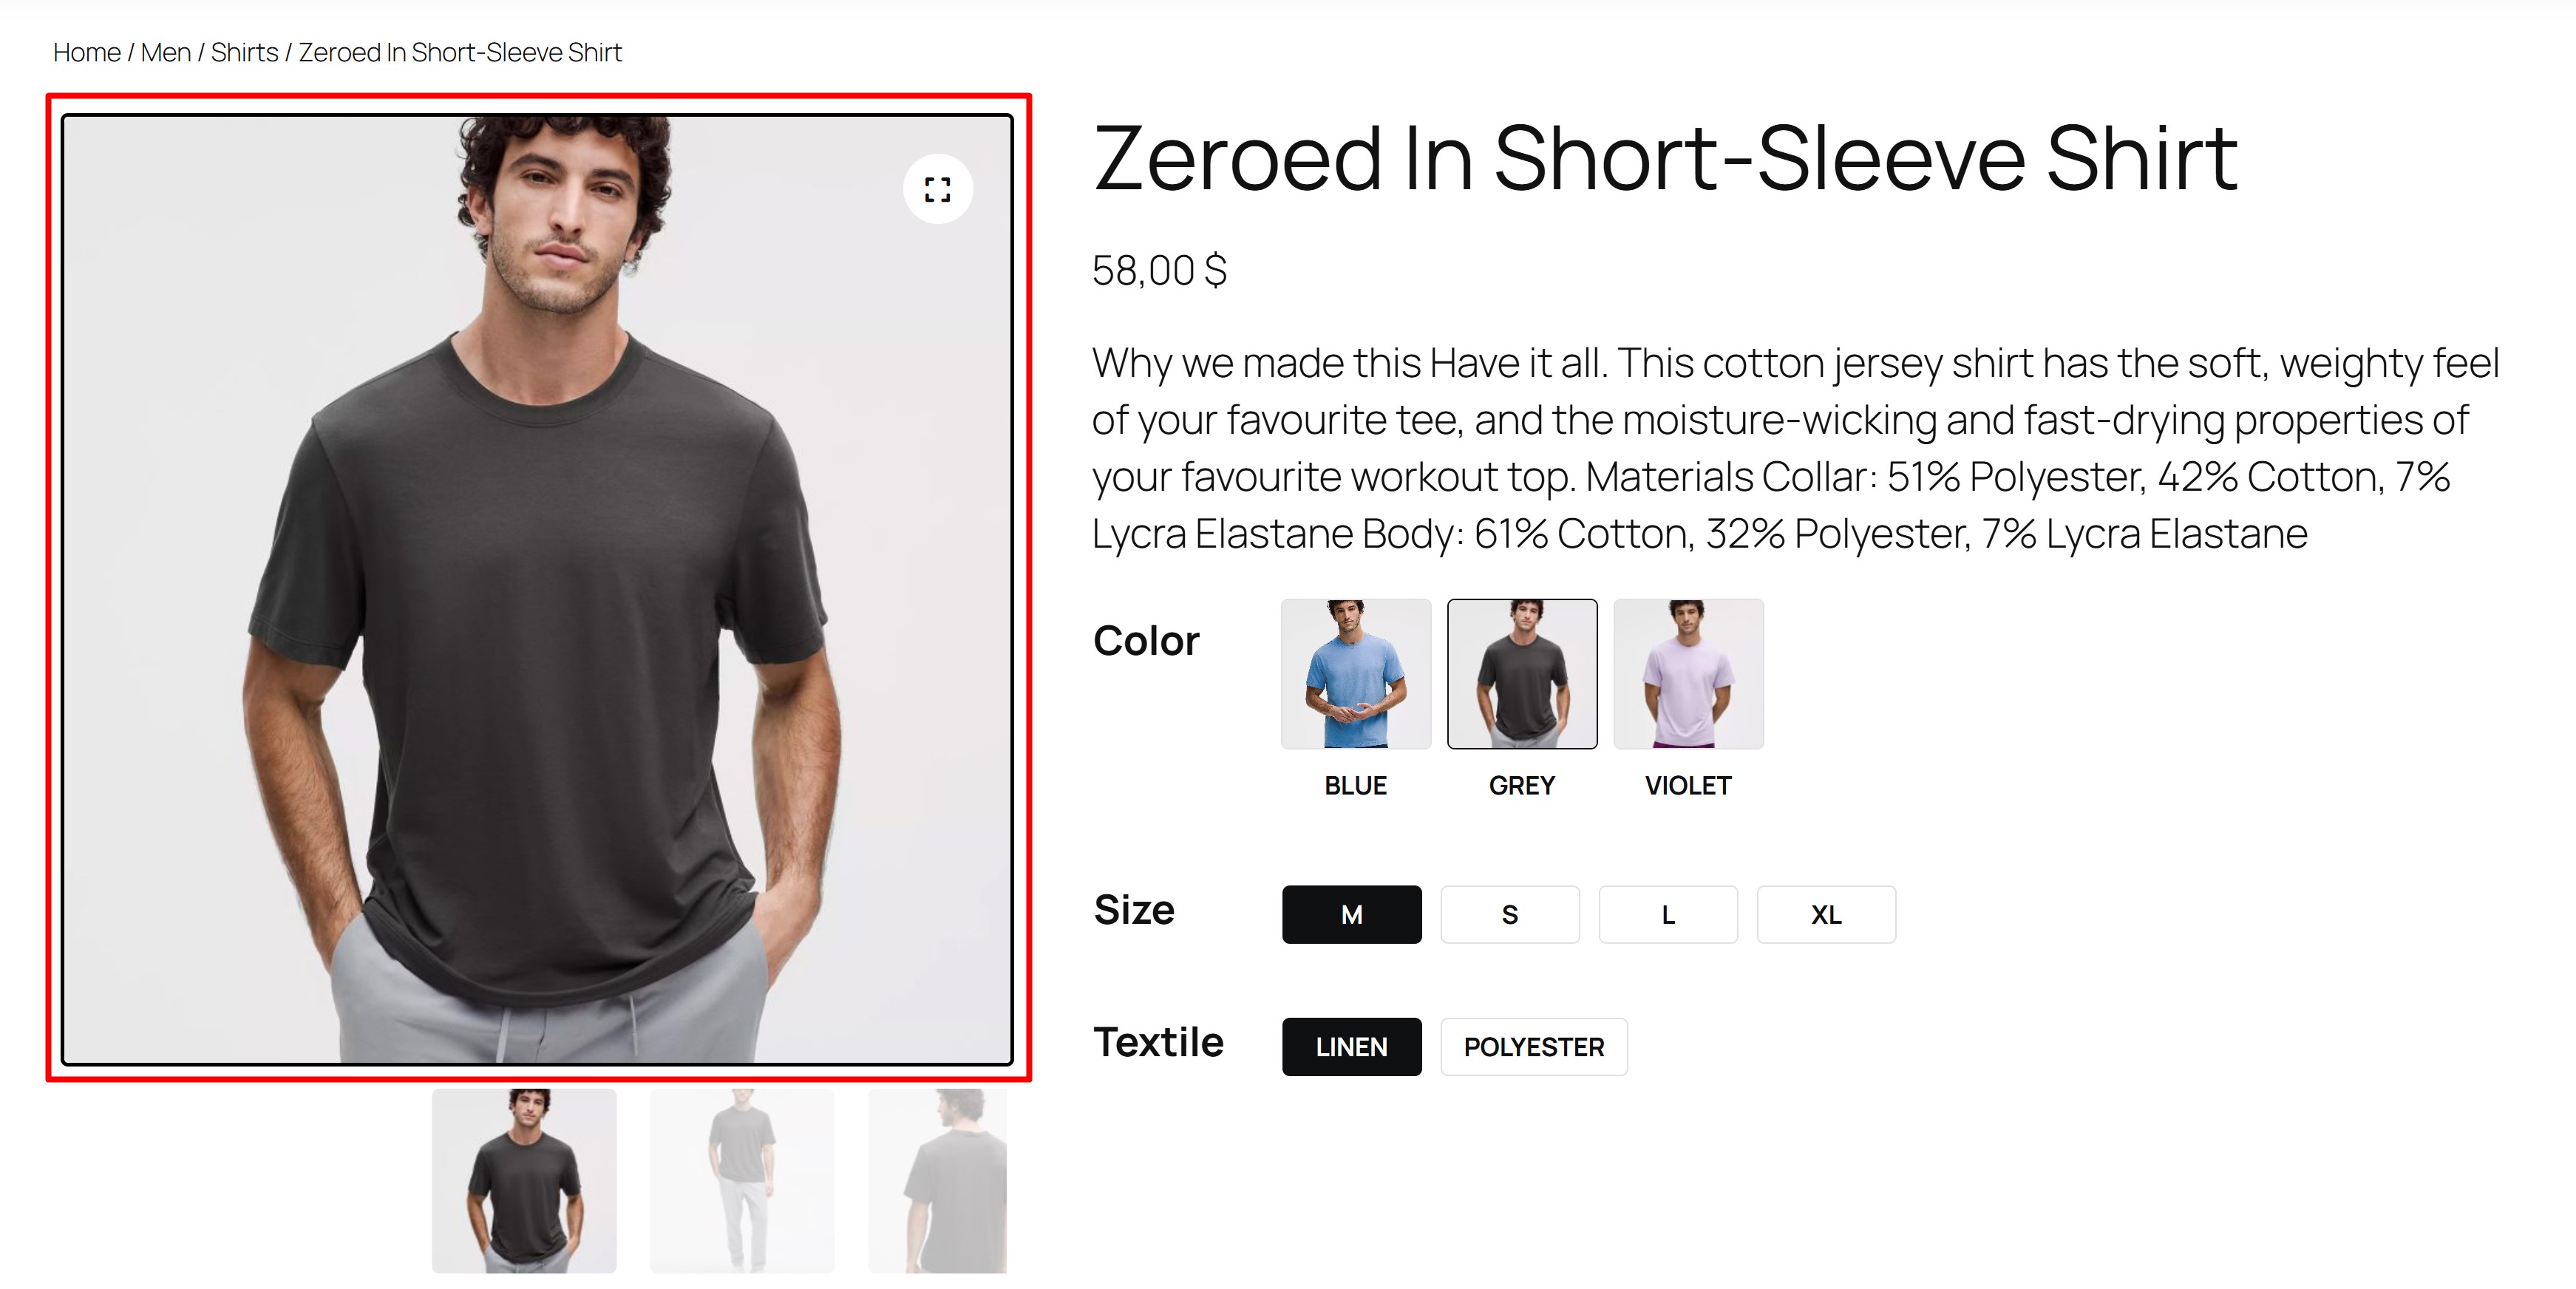
- Gallery Main Image Border Radius – From here you can set the Border Radius for the main image in the gallery
- Gallery Main Image Border Color – From here you can set the Border Color for the main image in the gallery

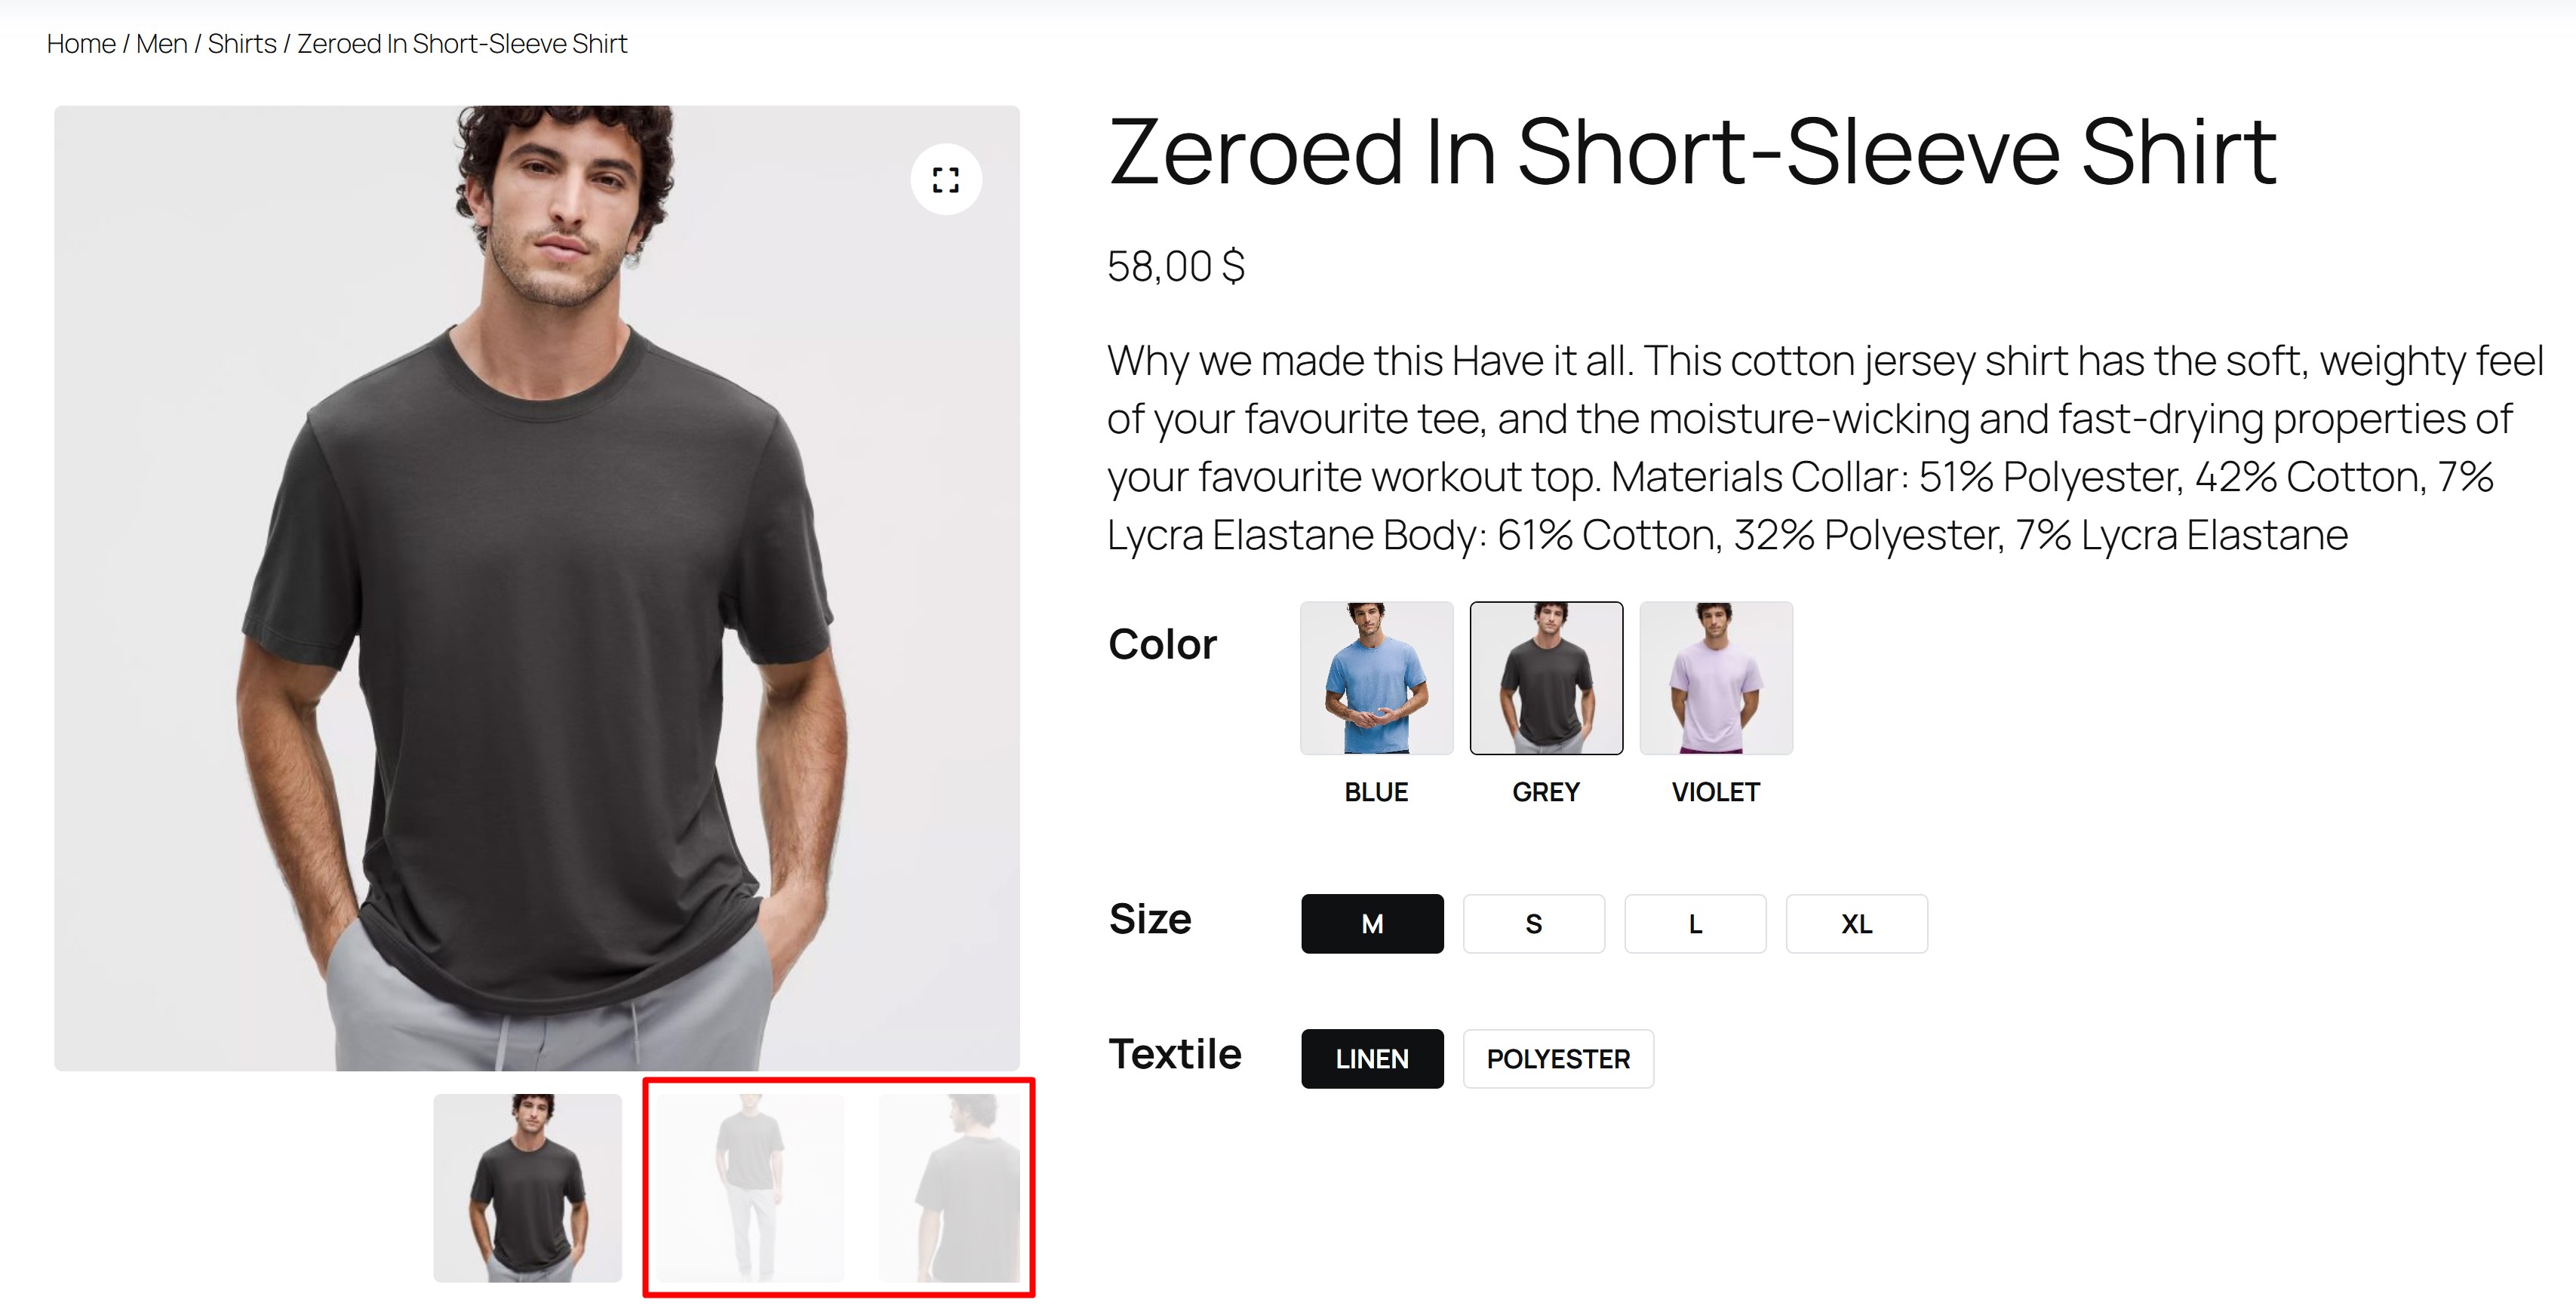
- Gallery Thumbnail Image Border Width – From here you can set the Border Width for the thumbnail image
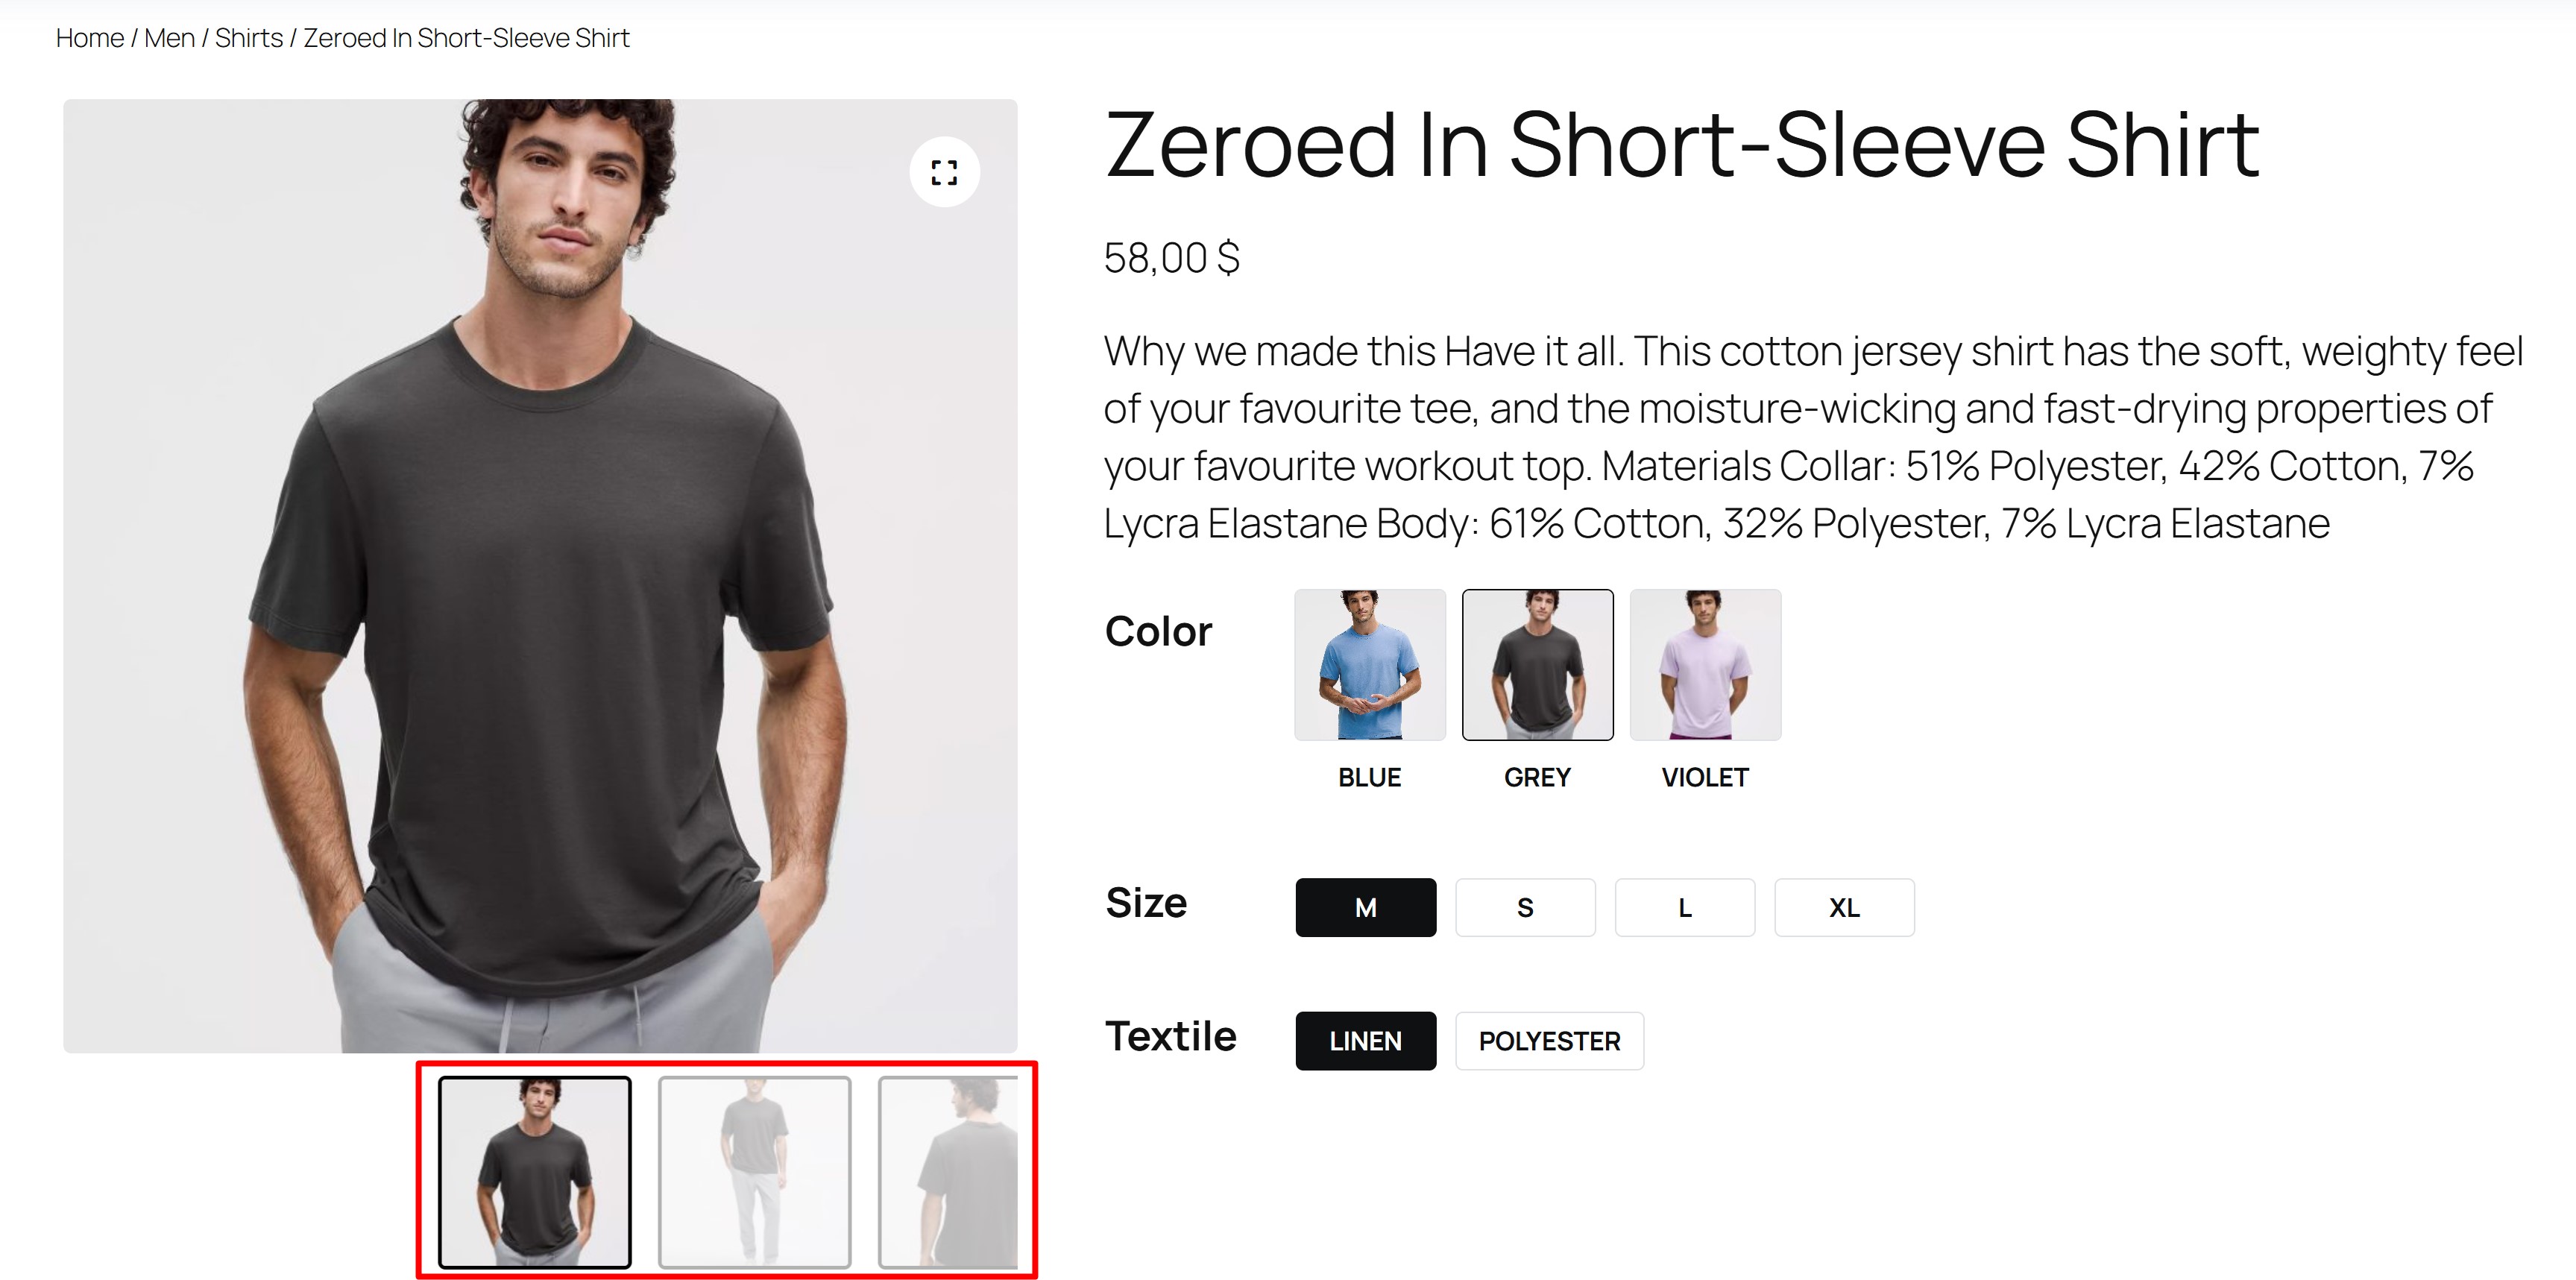
- Gallery Thumbnail Image Border Radius – From here you can set the Border Radius for the thumbnail image
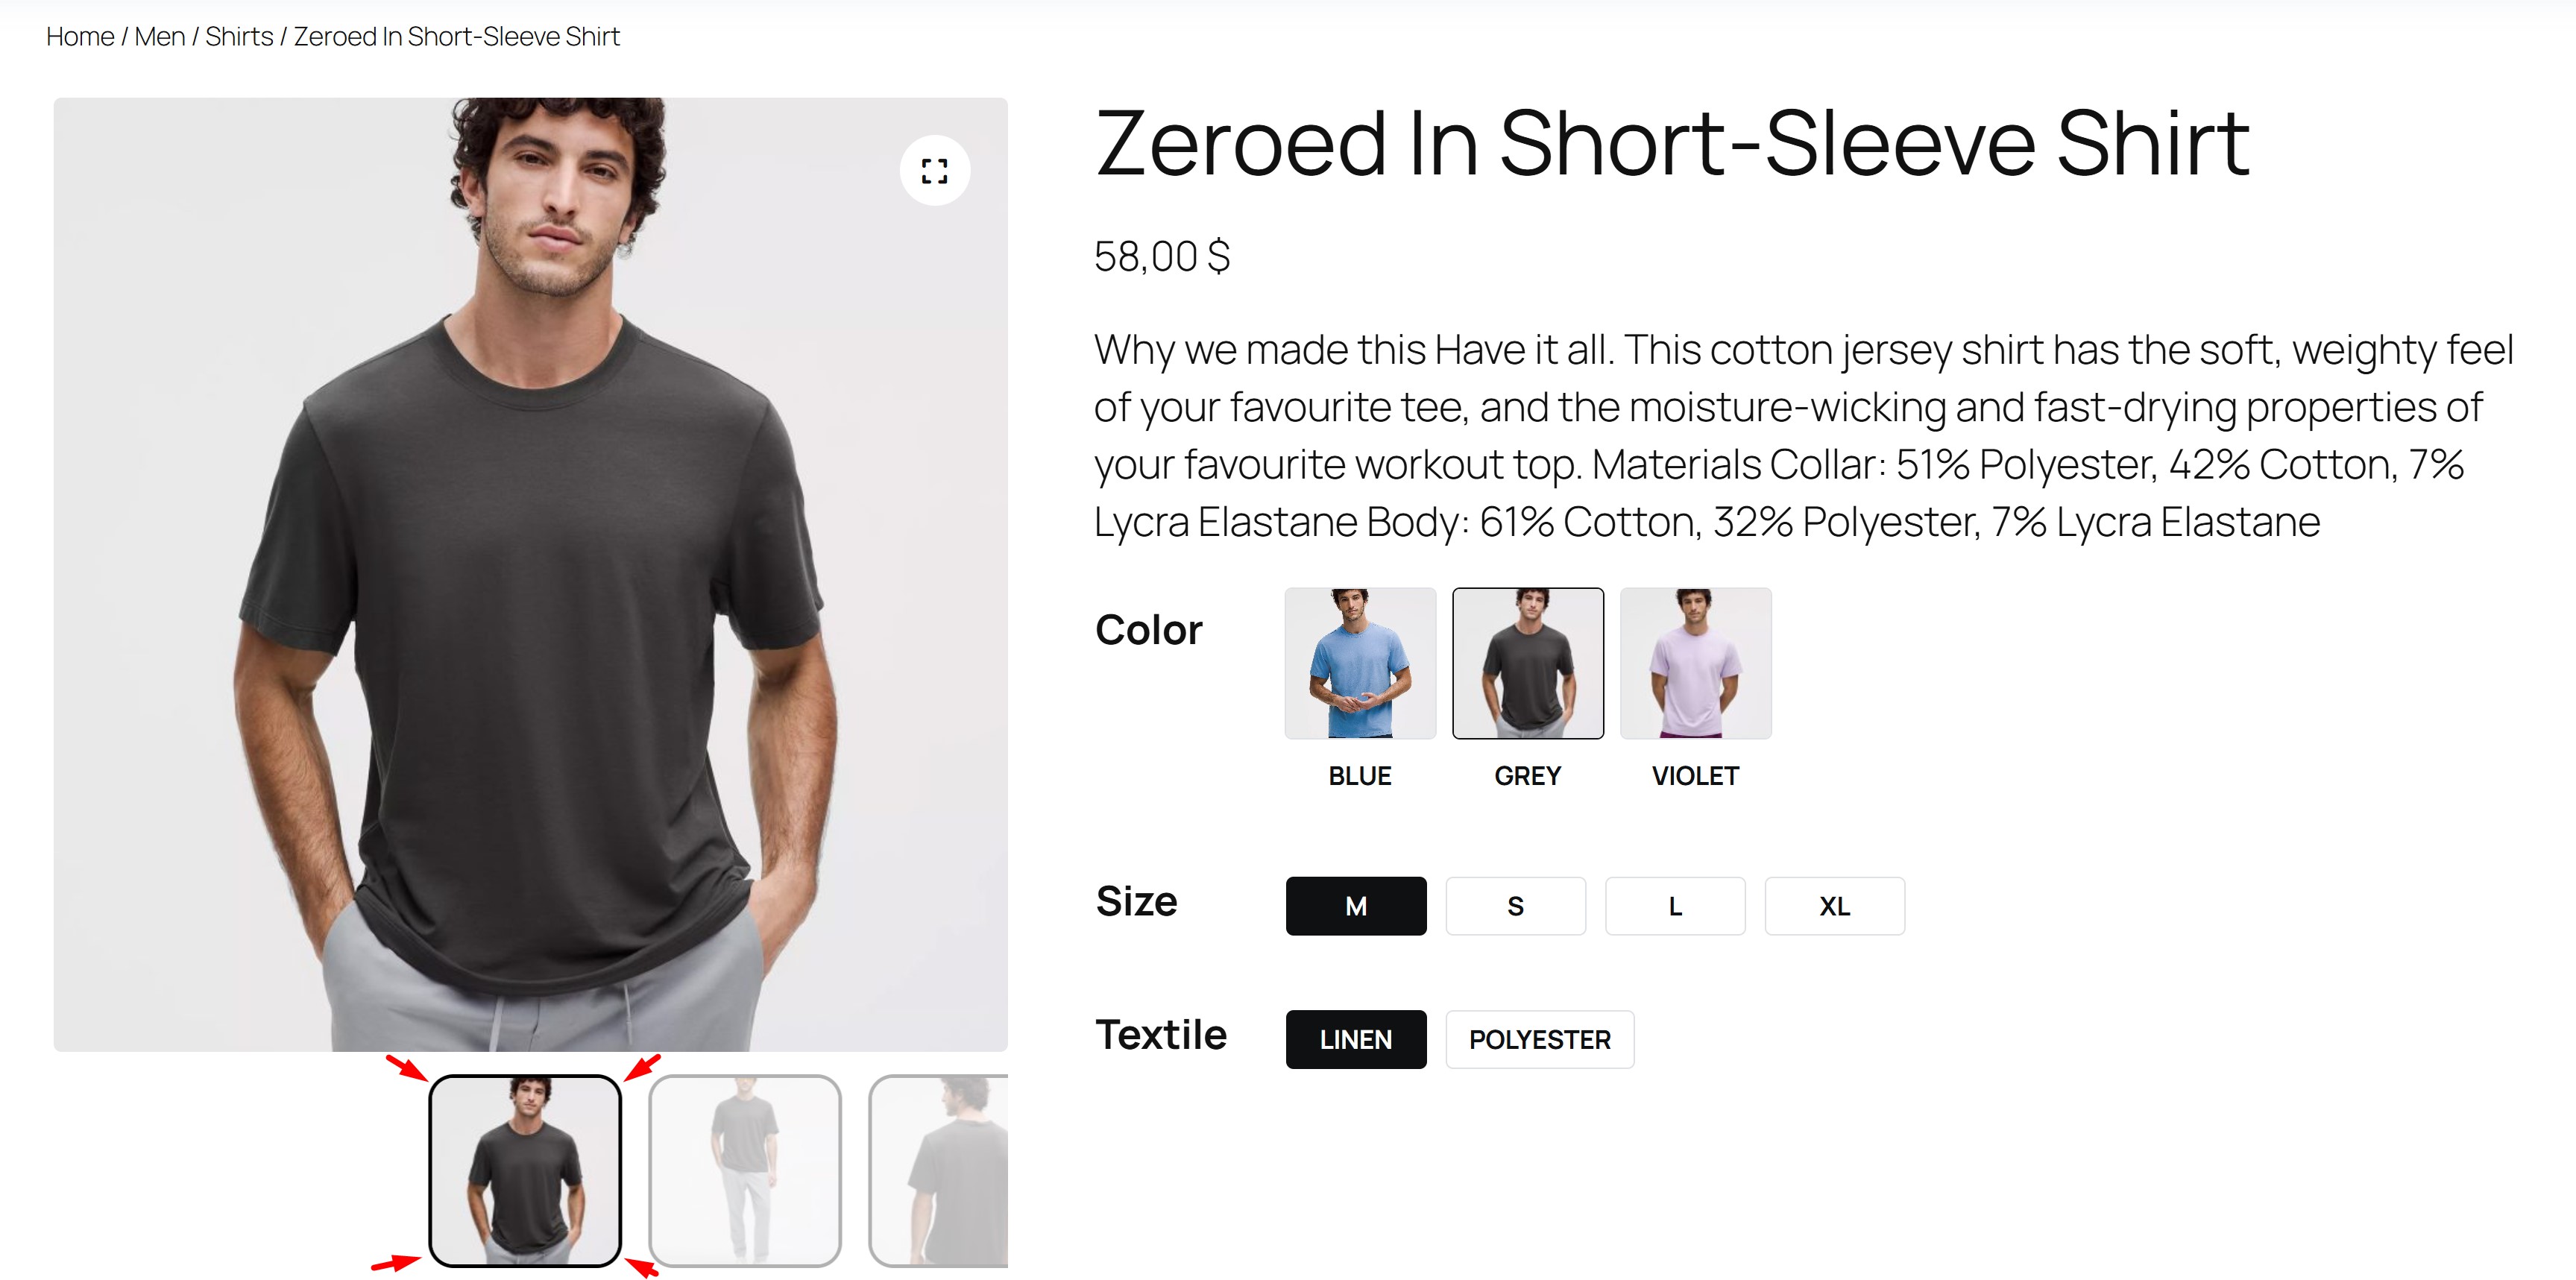
- Gallery Thumbnail Image Border Color – From here you can set the Border Color for the thumbnail image

- Gallery Thumbnail Image Opacity – From here you can set the opacity of the inactive thumbnail image
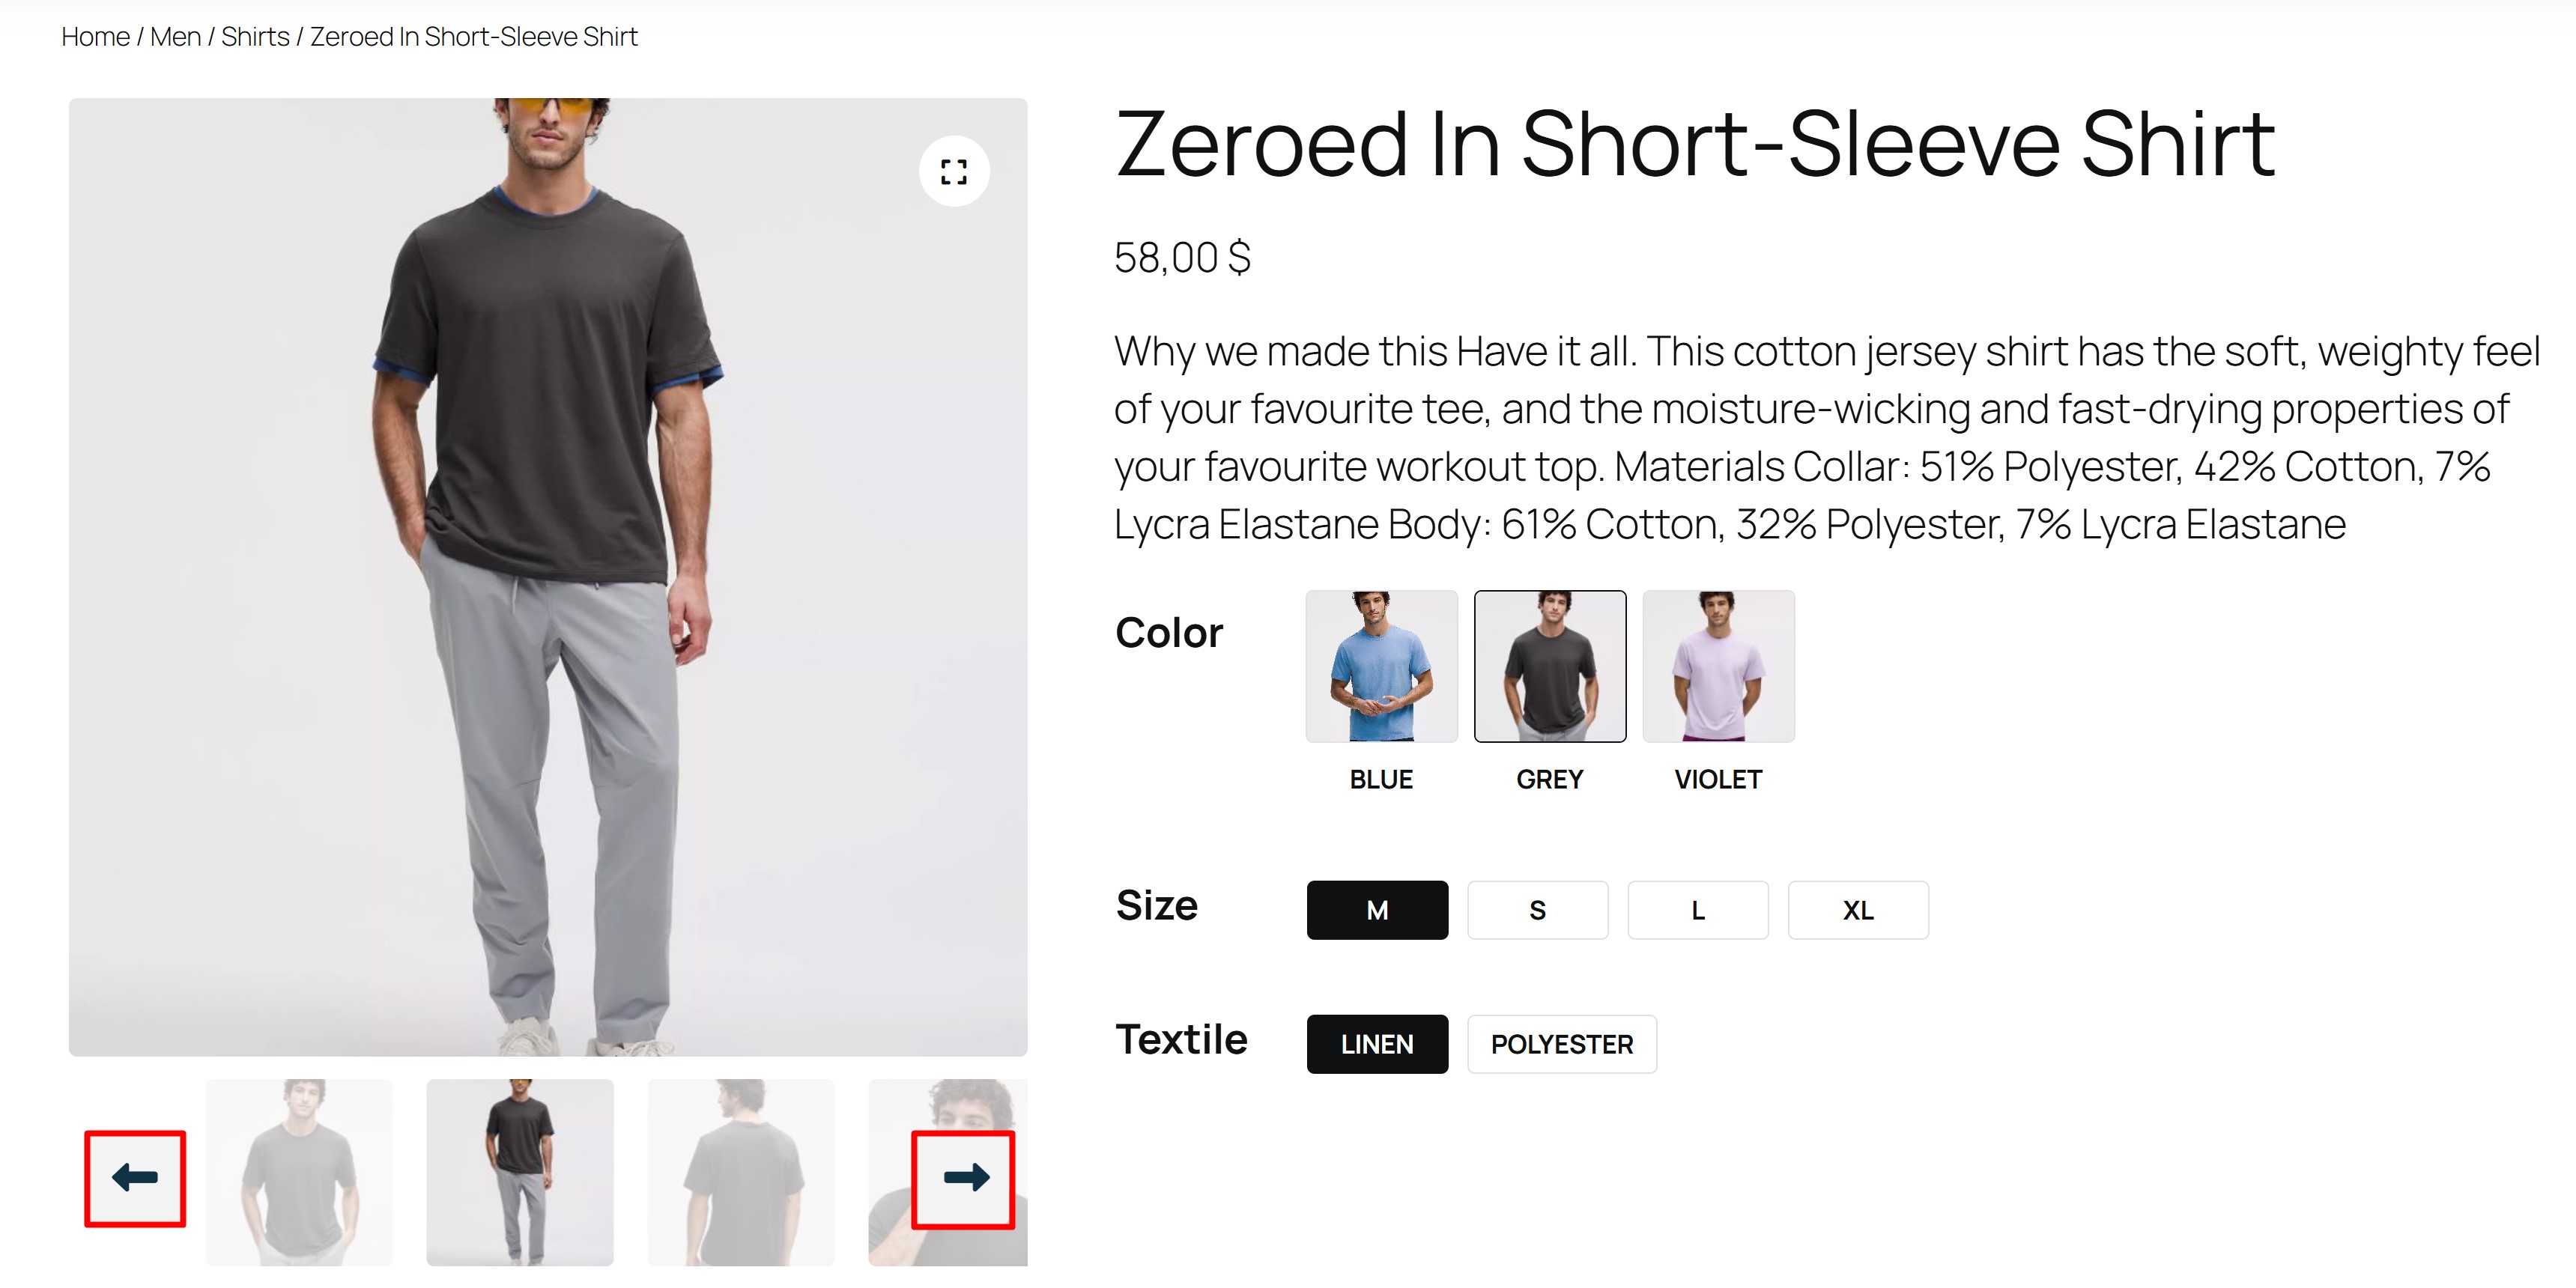
- Thumbnail Arrow Design – From here you can define the design of the navigation arrows that move between images in the thumbnail block, choose one of three.
- Variation Label Border Width – From here you can set the Border Width for the Variation labels

- Variation Label Border Color – From here you can set the Border Color for the Variation labels
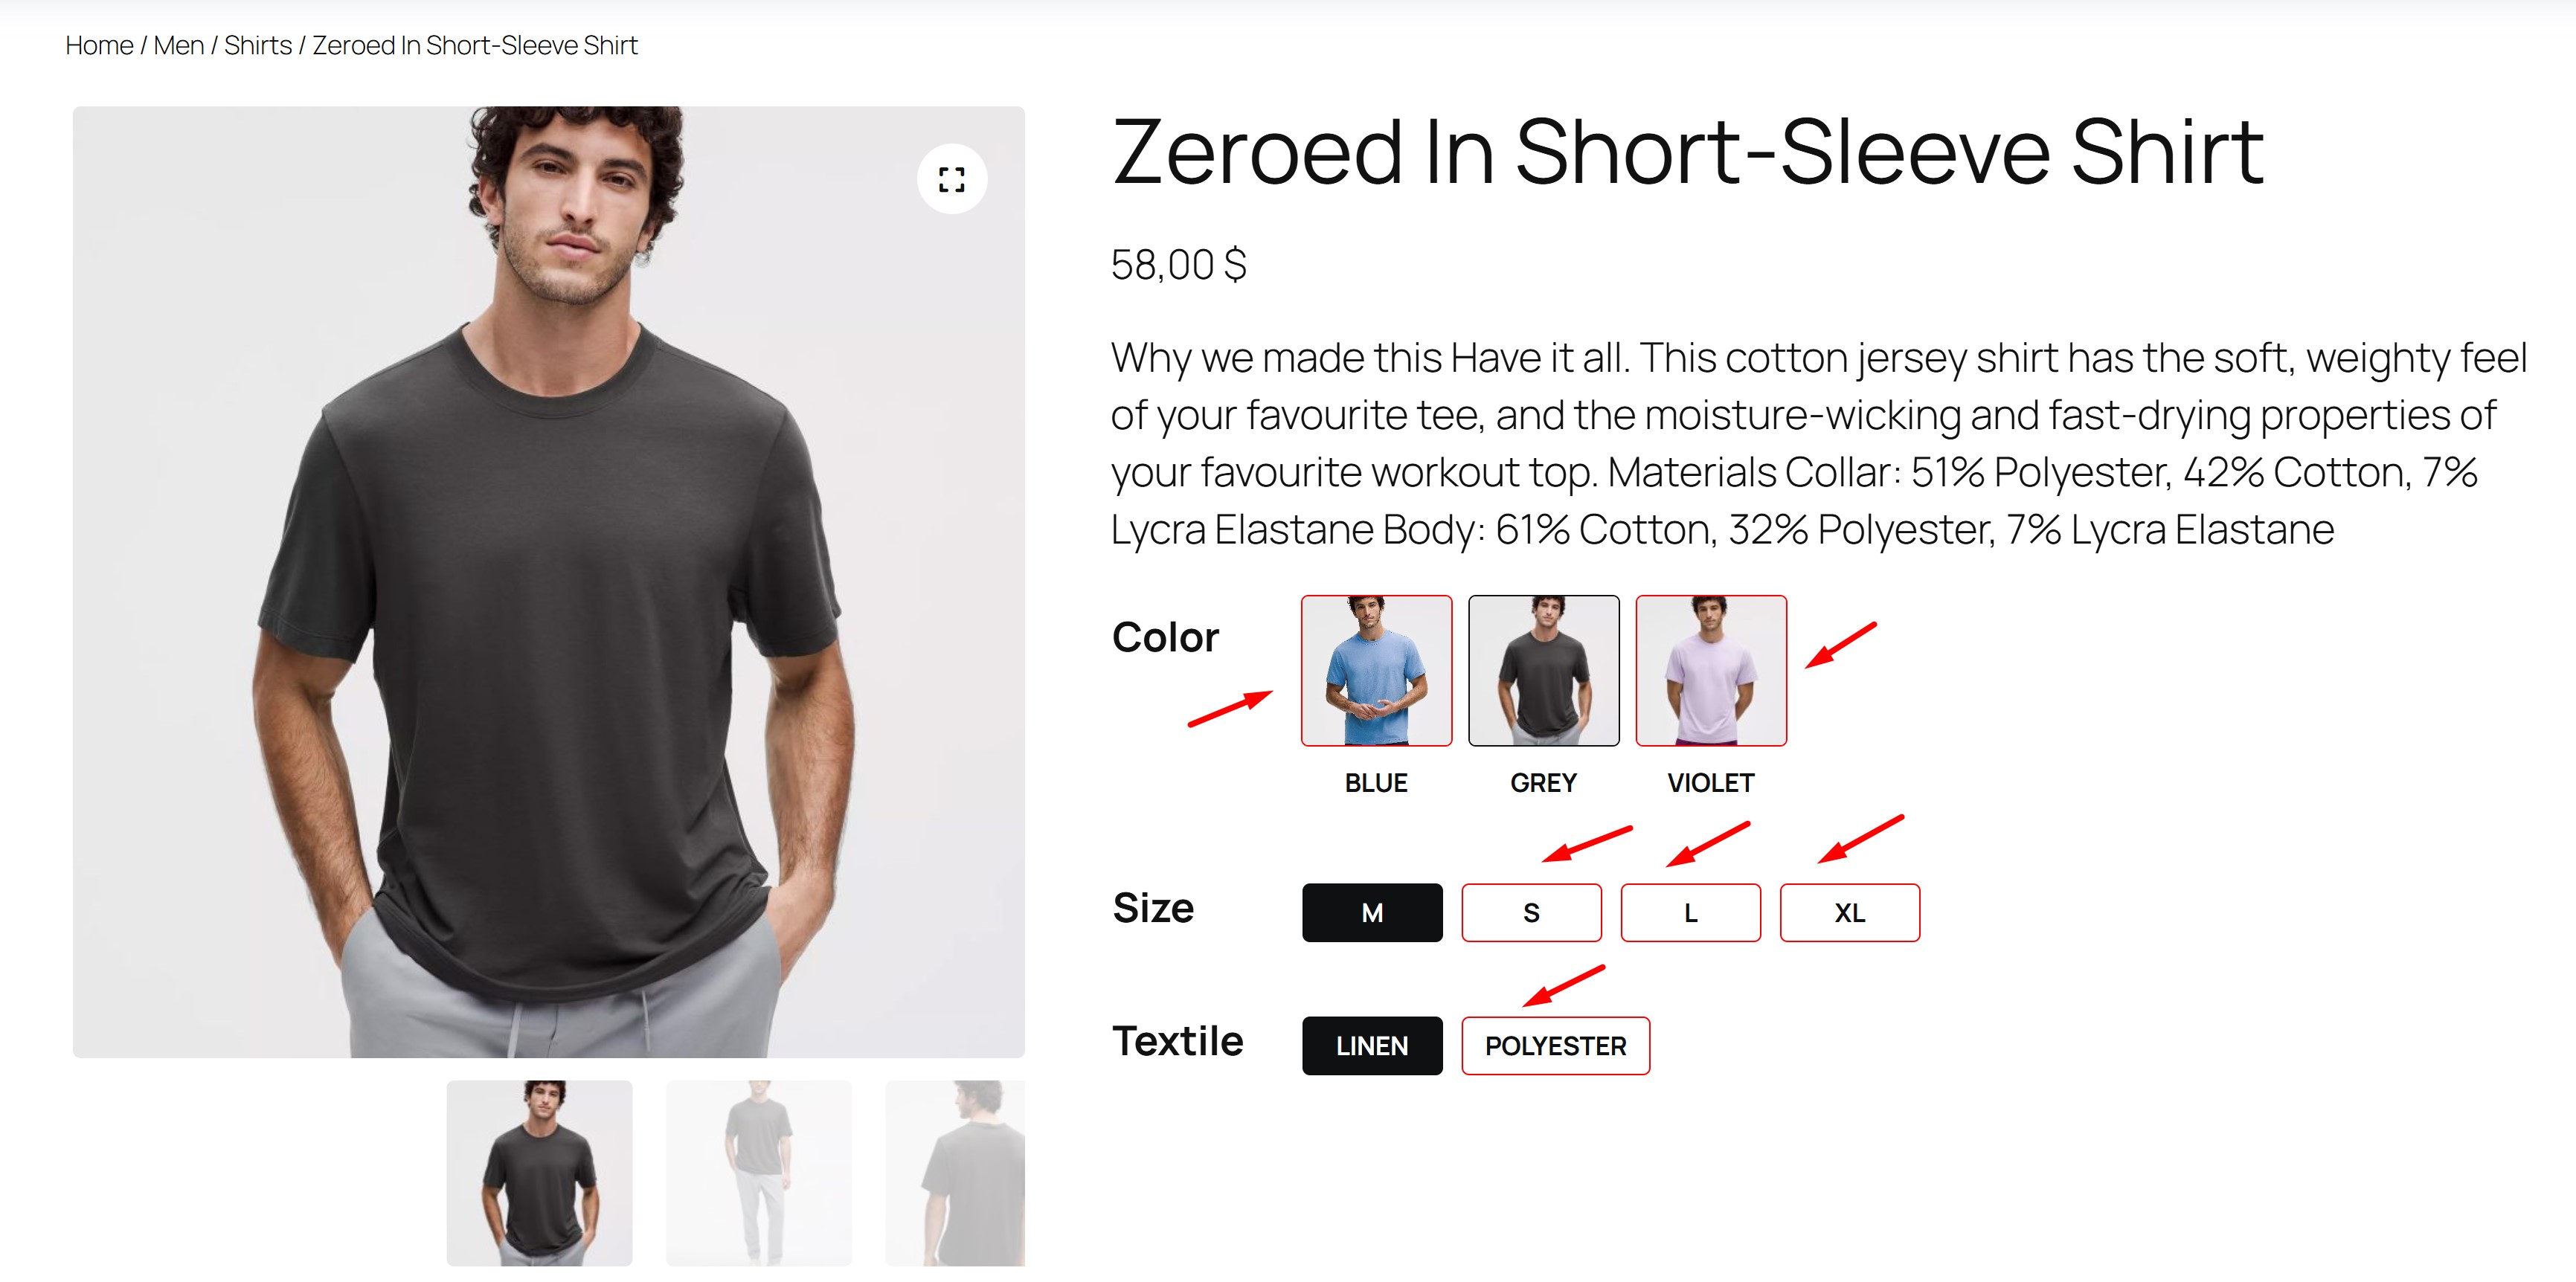
- Variation Label Border Hover Color – From here you can set the Border Hover Color for the Variation labels
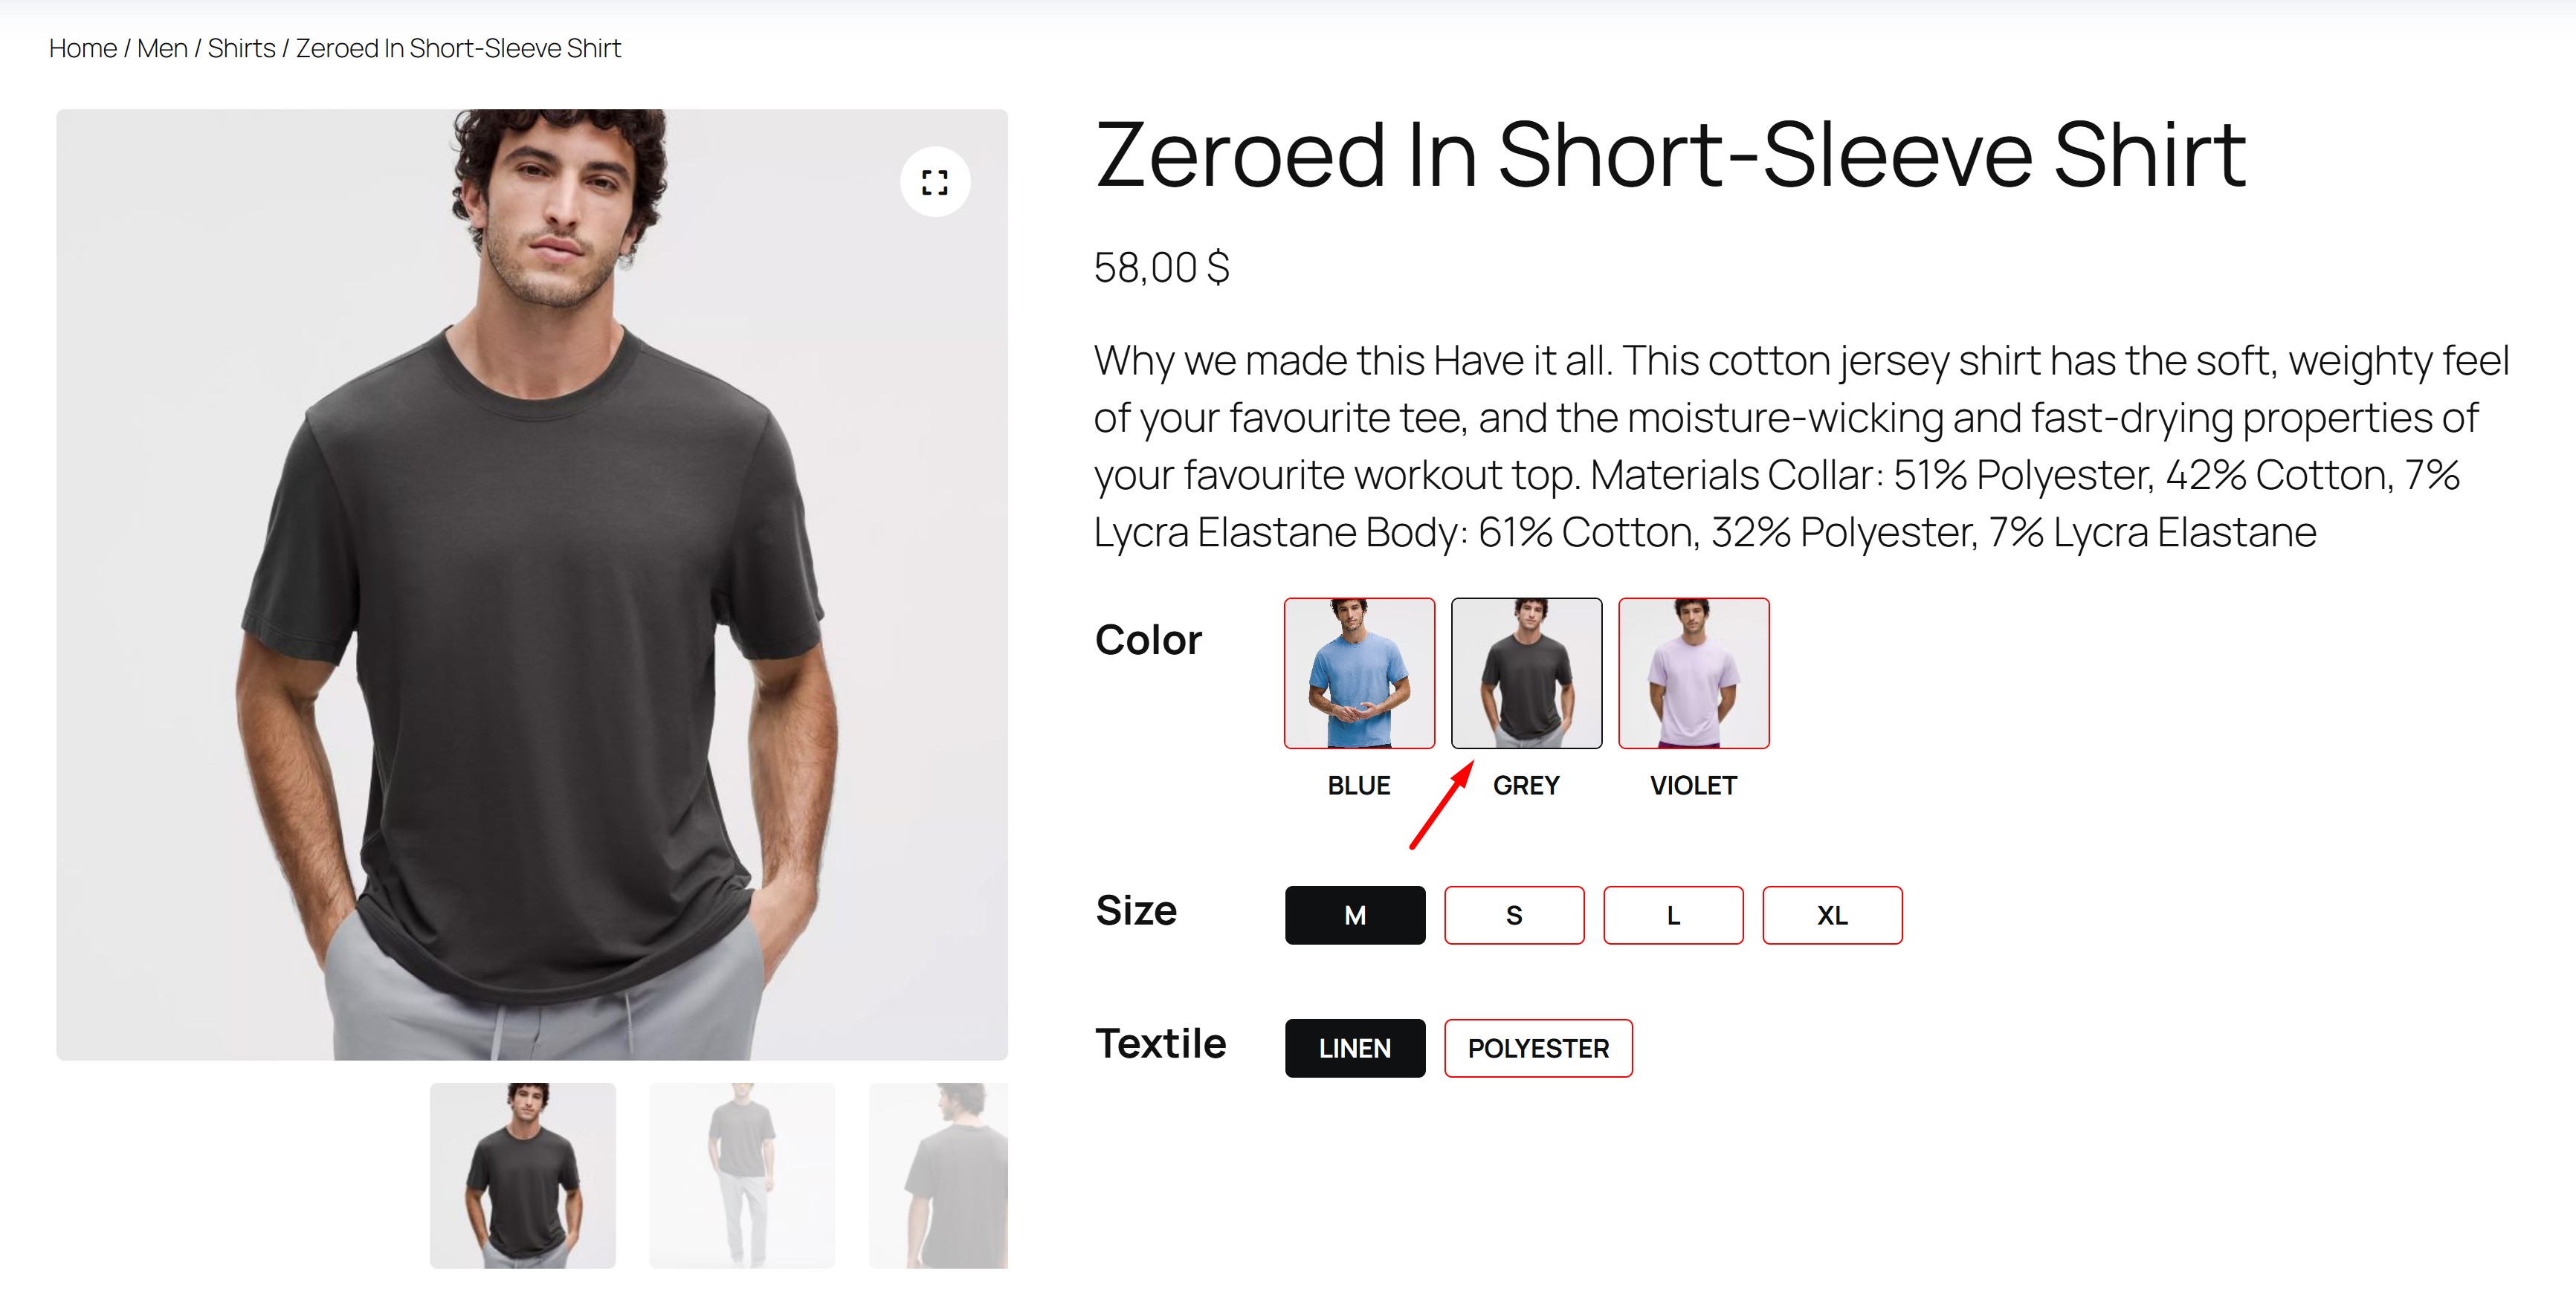
- Variation Label Background Color – From here you can set the Background Color for Variation labels
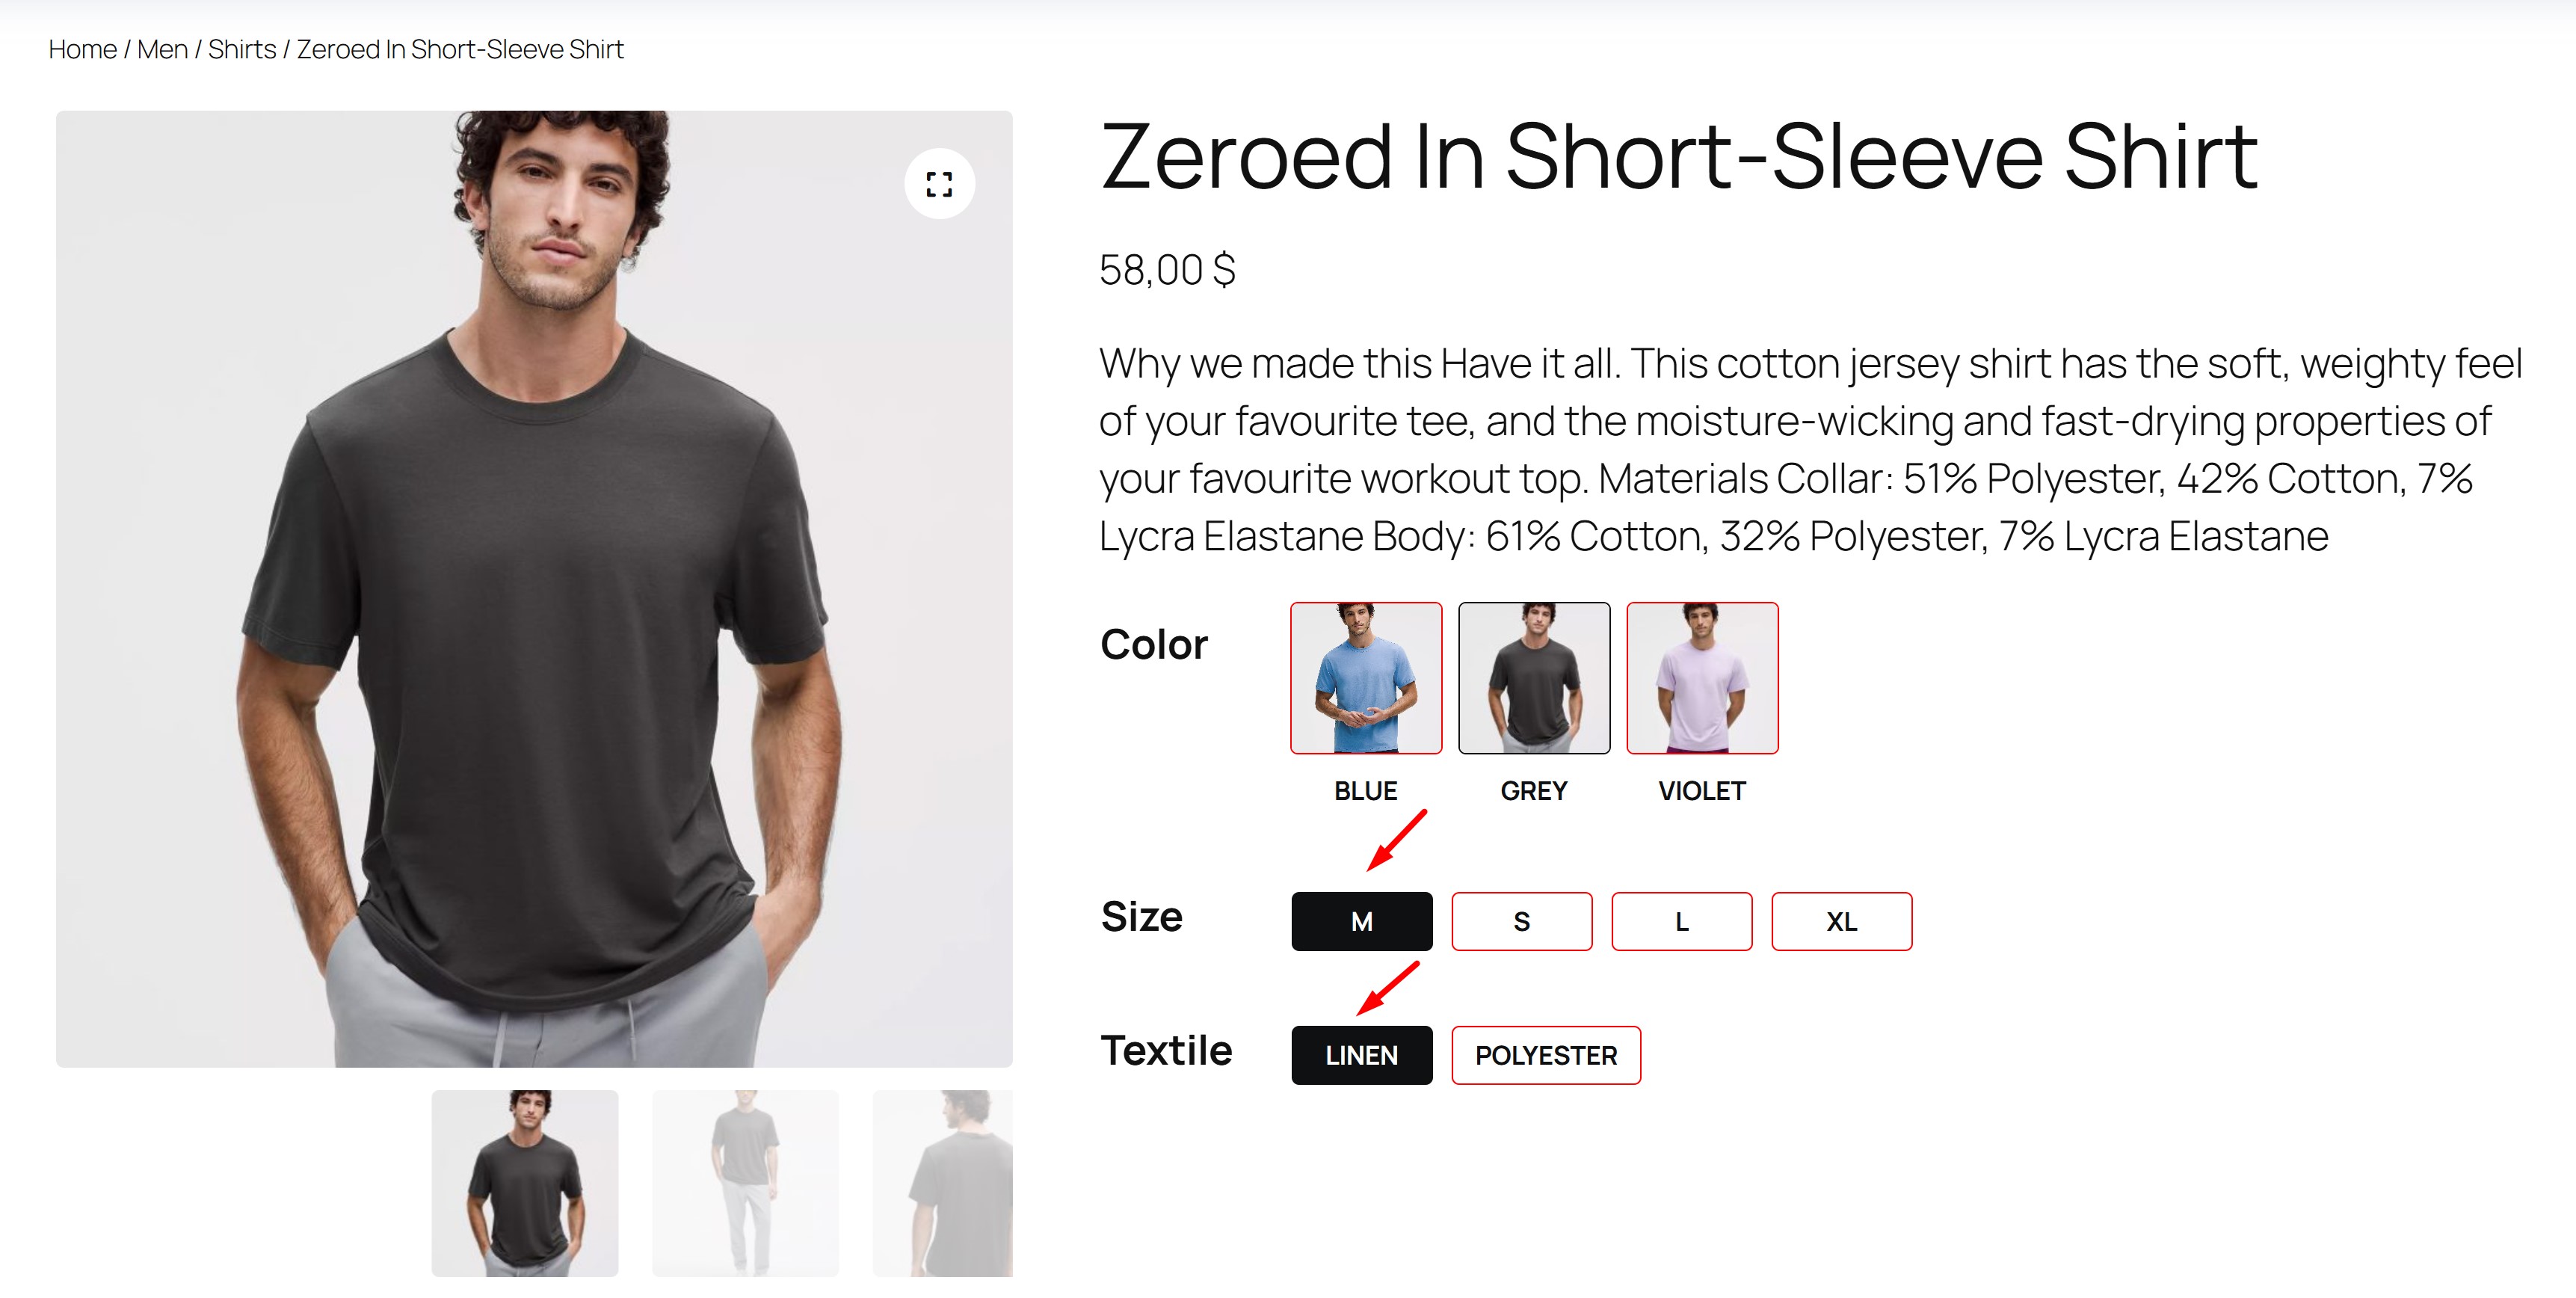
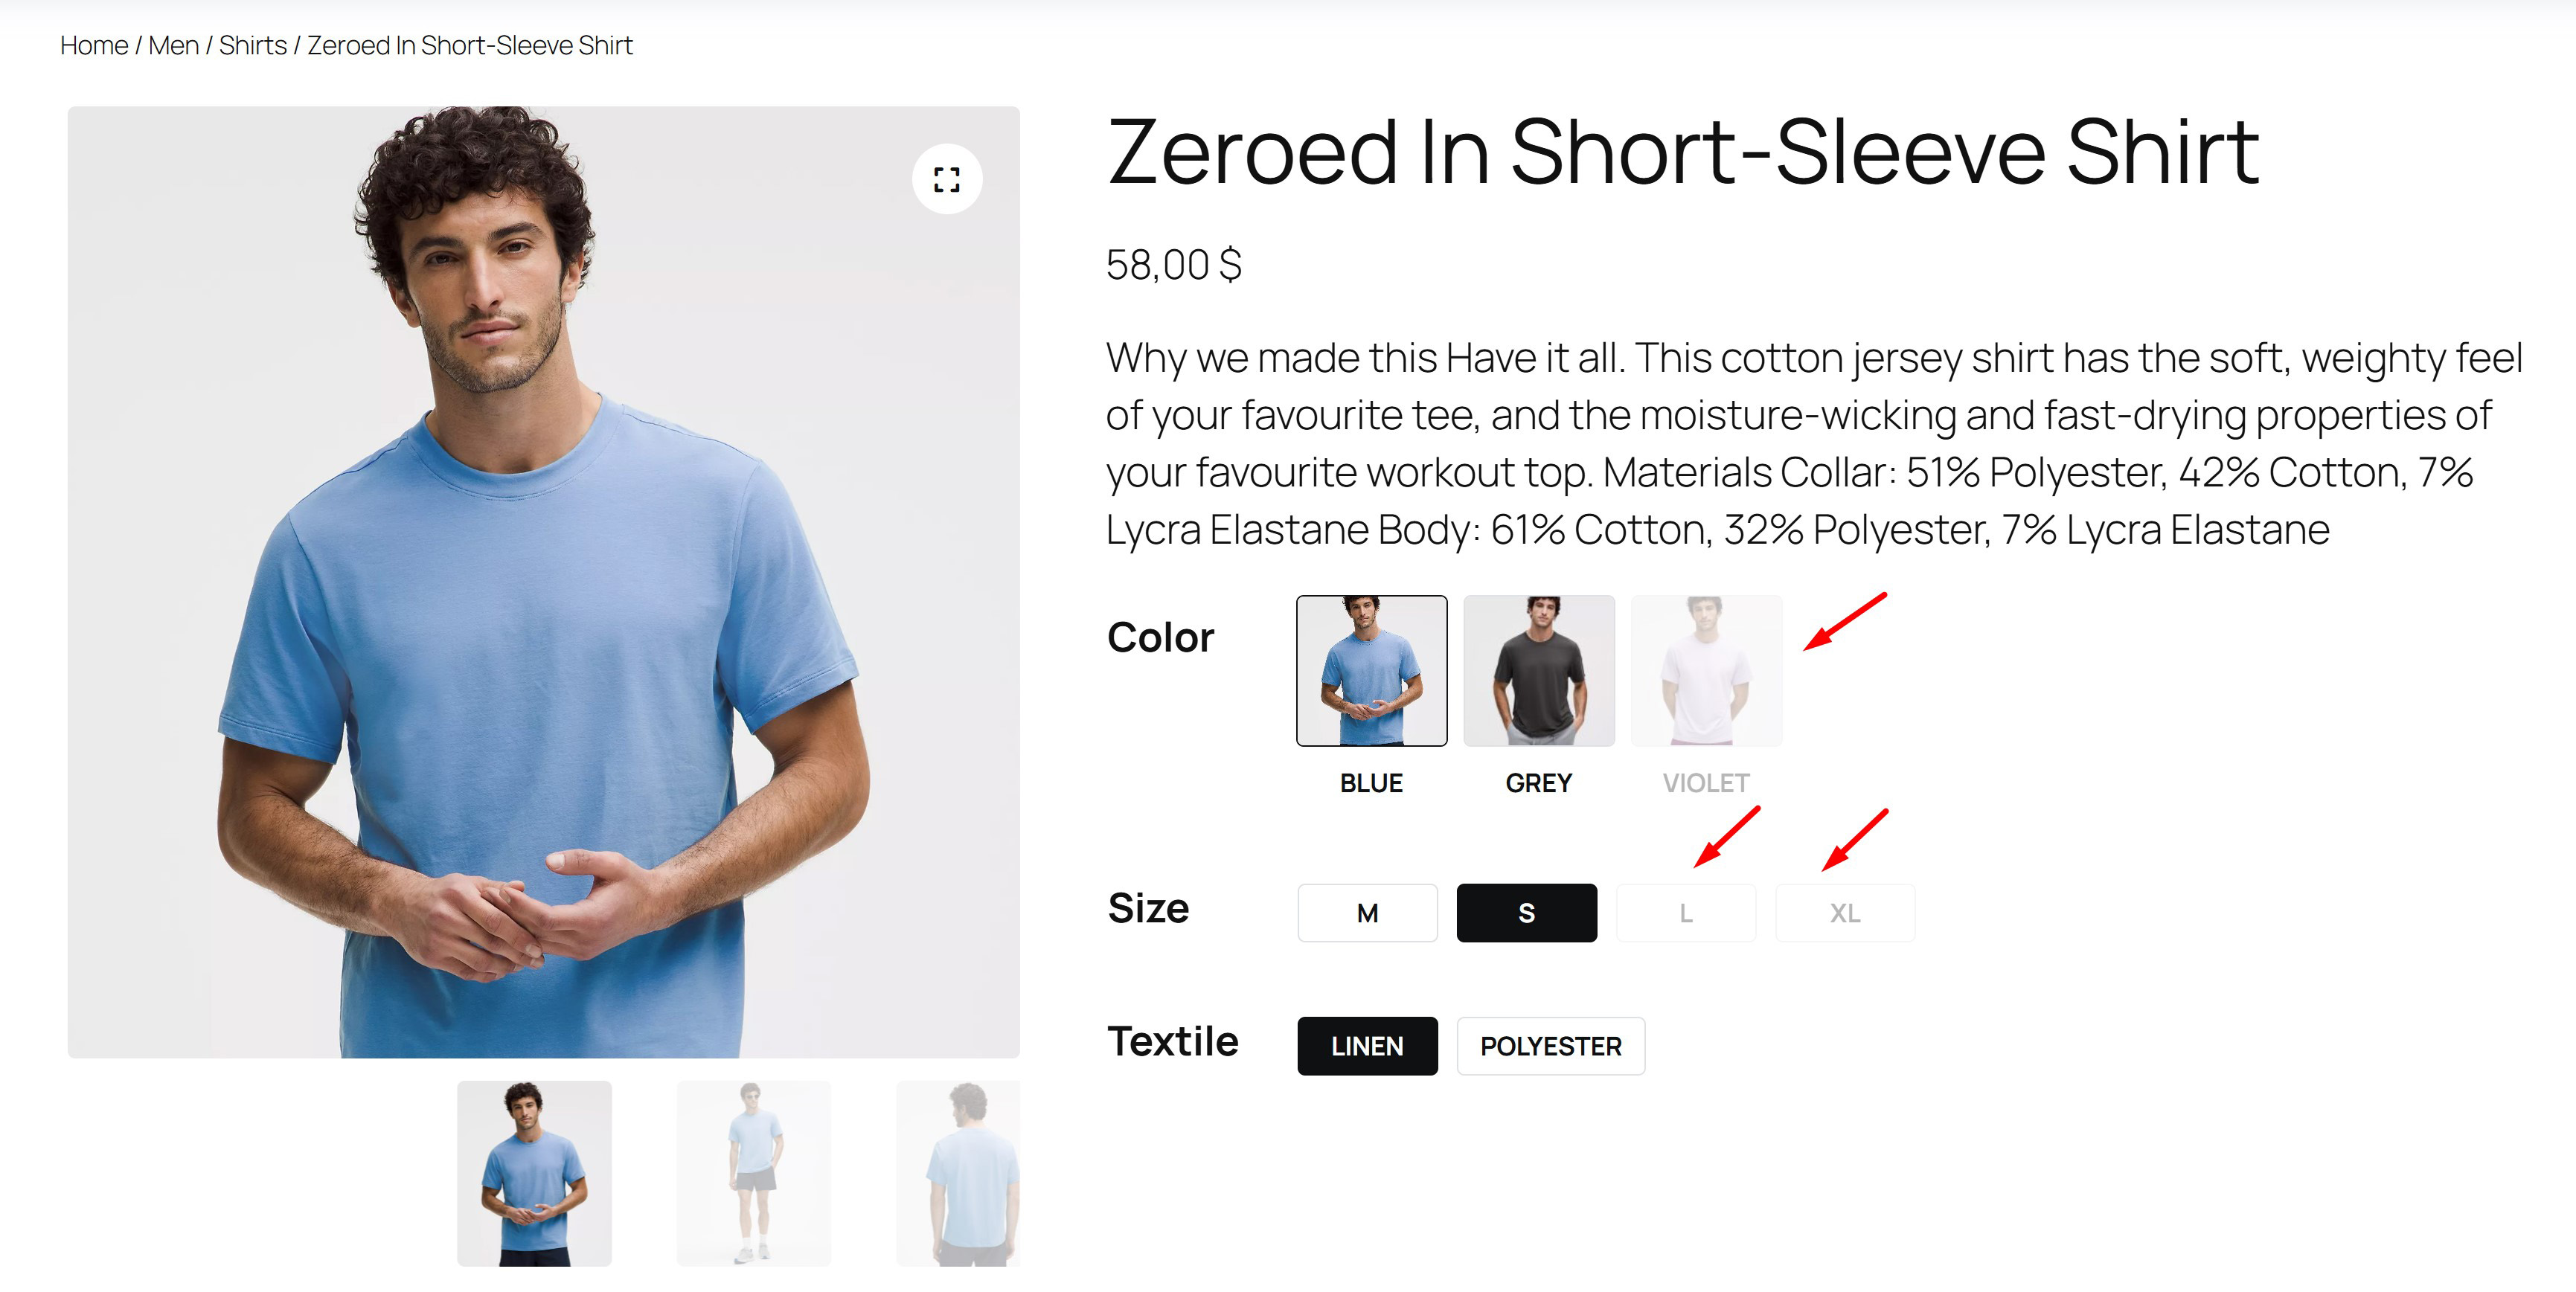
- Disabled Variation Label Opacity – From here you can set the Opacity of inactive Variation labels
Add Images For Variable Product
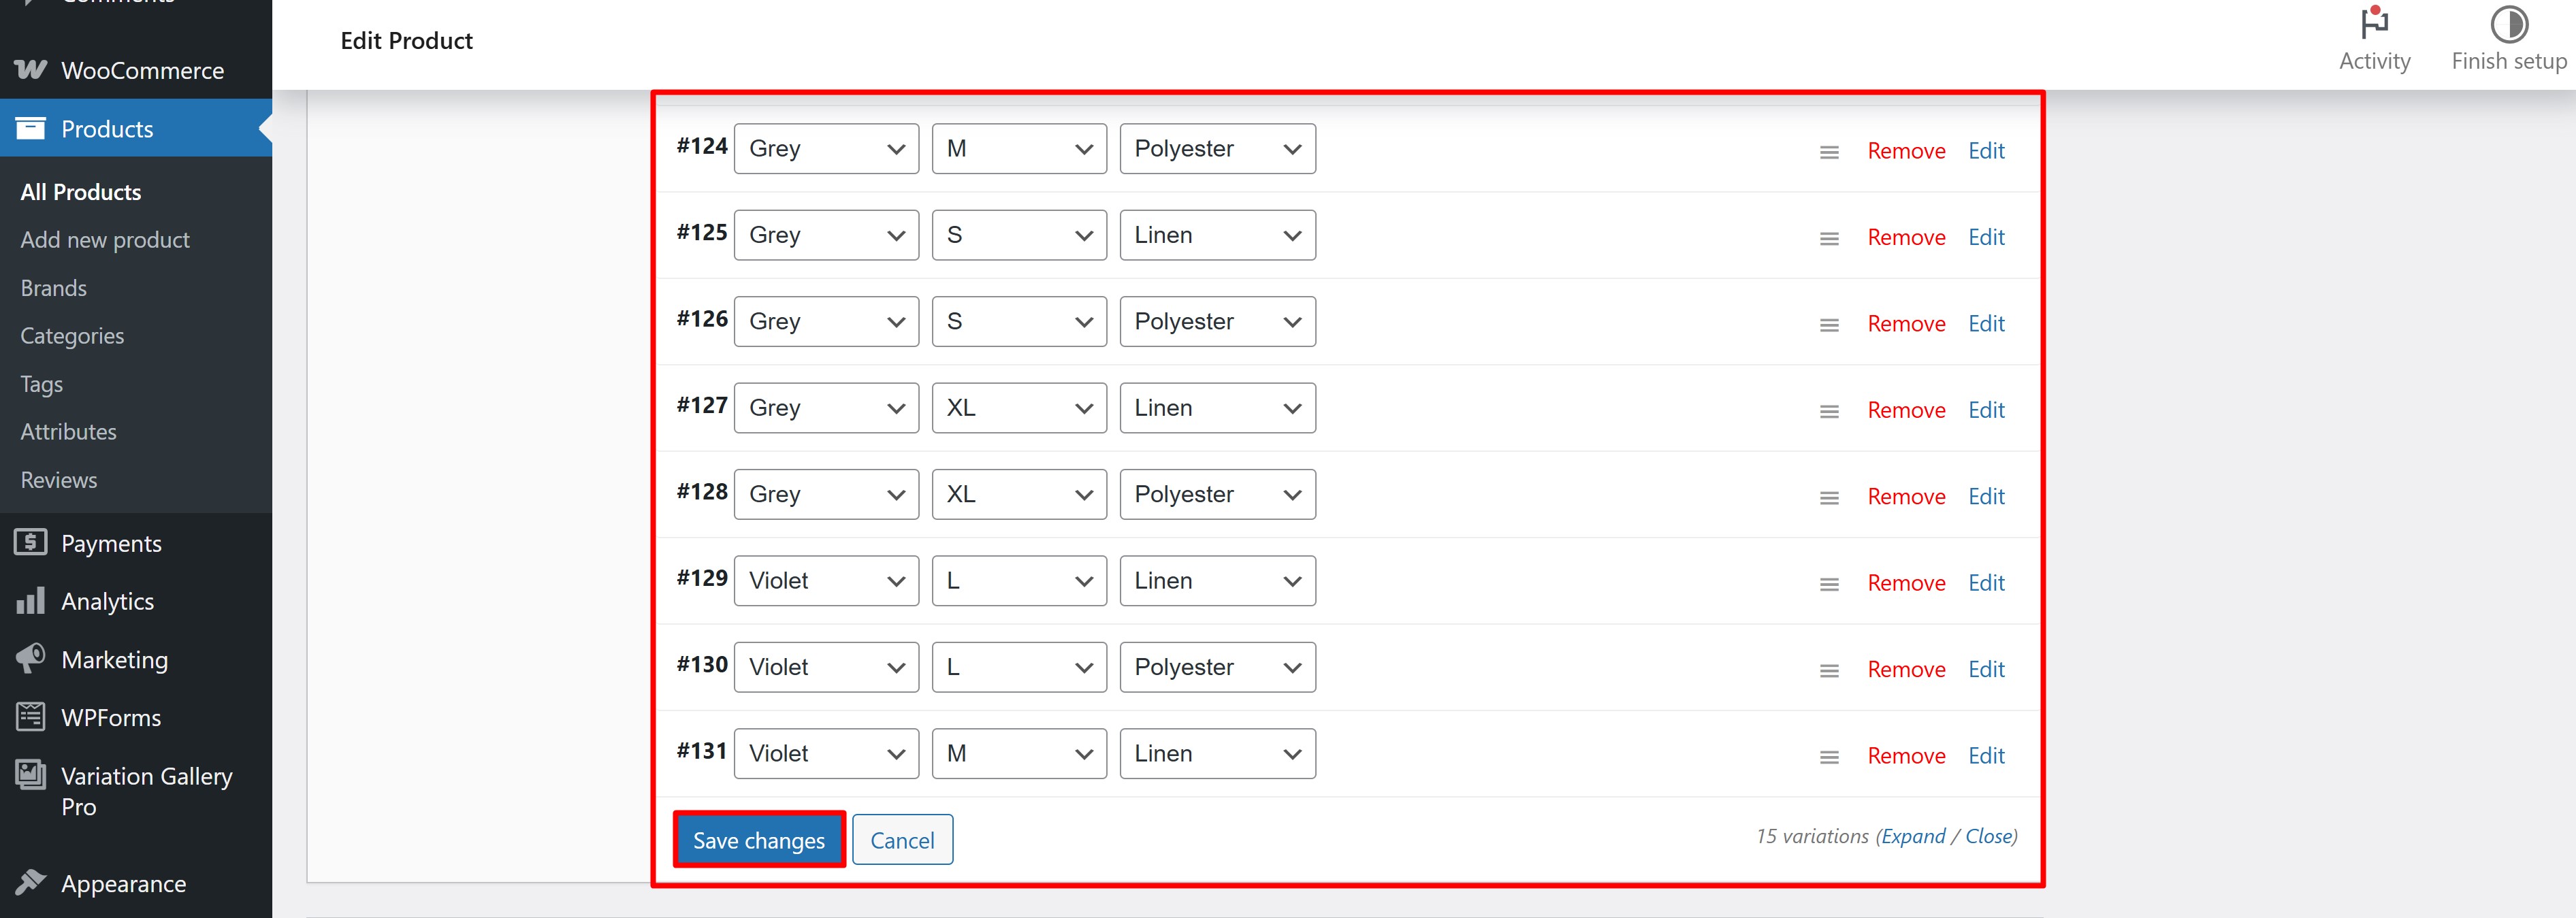
Adding images to a Variable product To add gallery images to each Variable product, you must be in Add new product or Edit product mode.
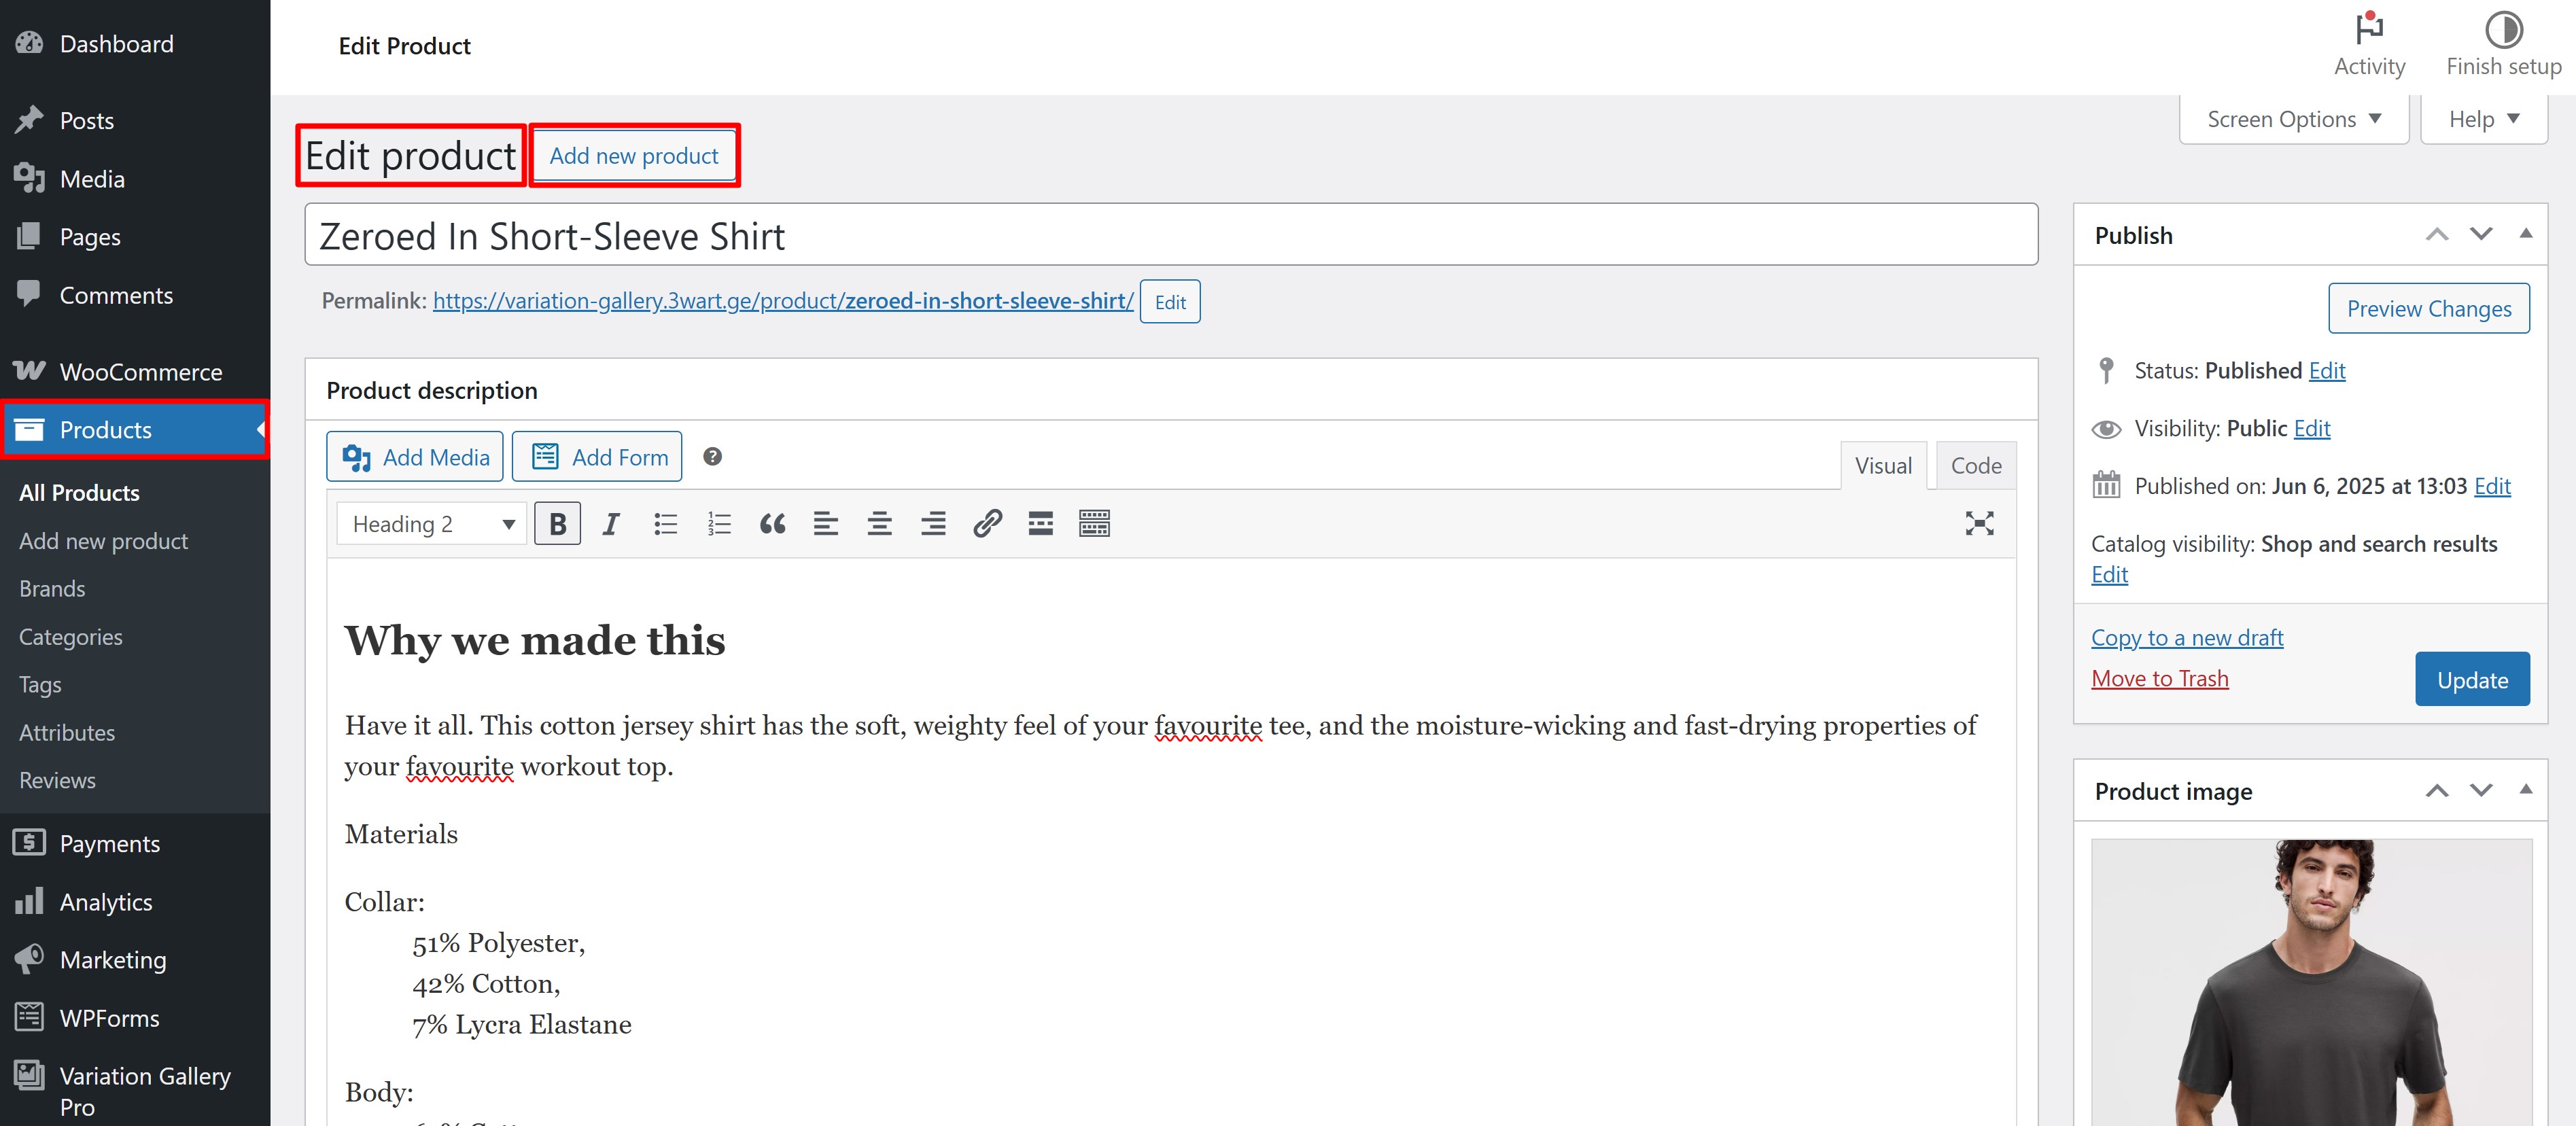
Then the Product Type must be set to Variable product
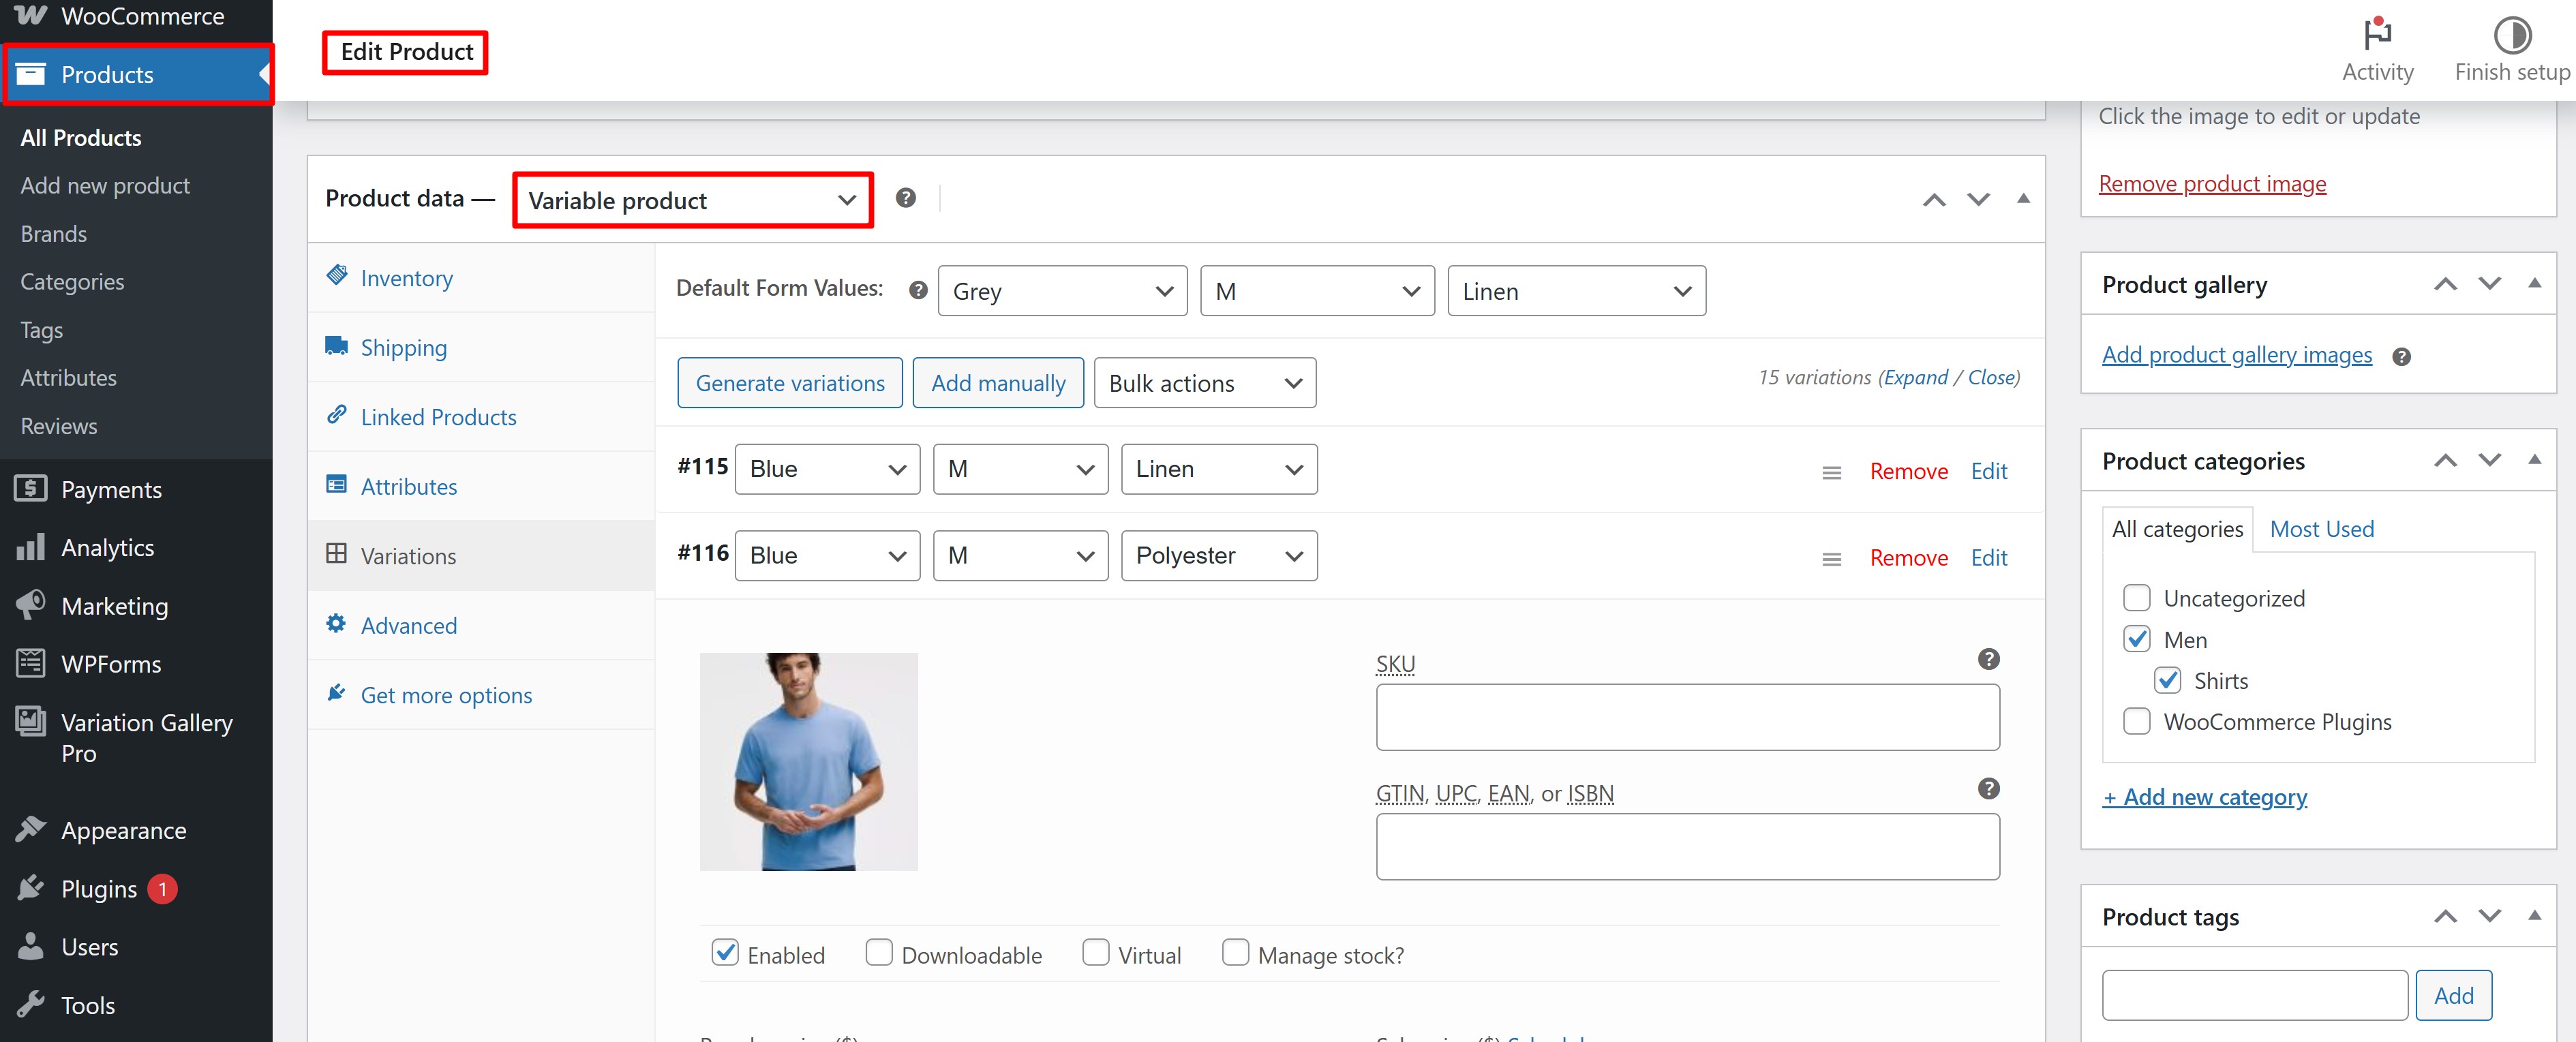
Each Variable product variation has its own editing block, at the bottom of this block is the Add Gallery Images button from where you can add images for a specific Variable product variation.
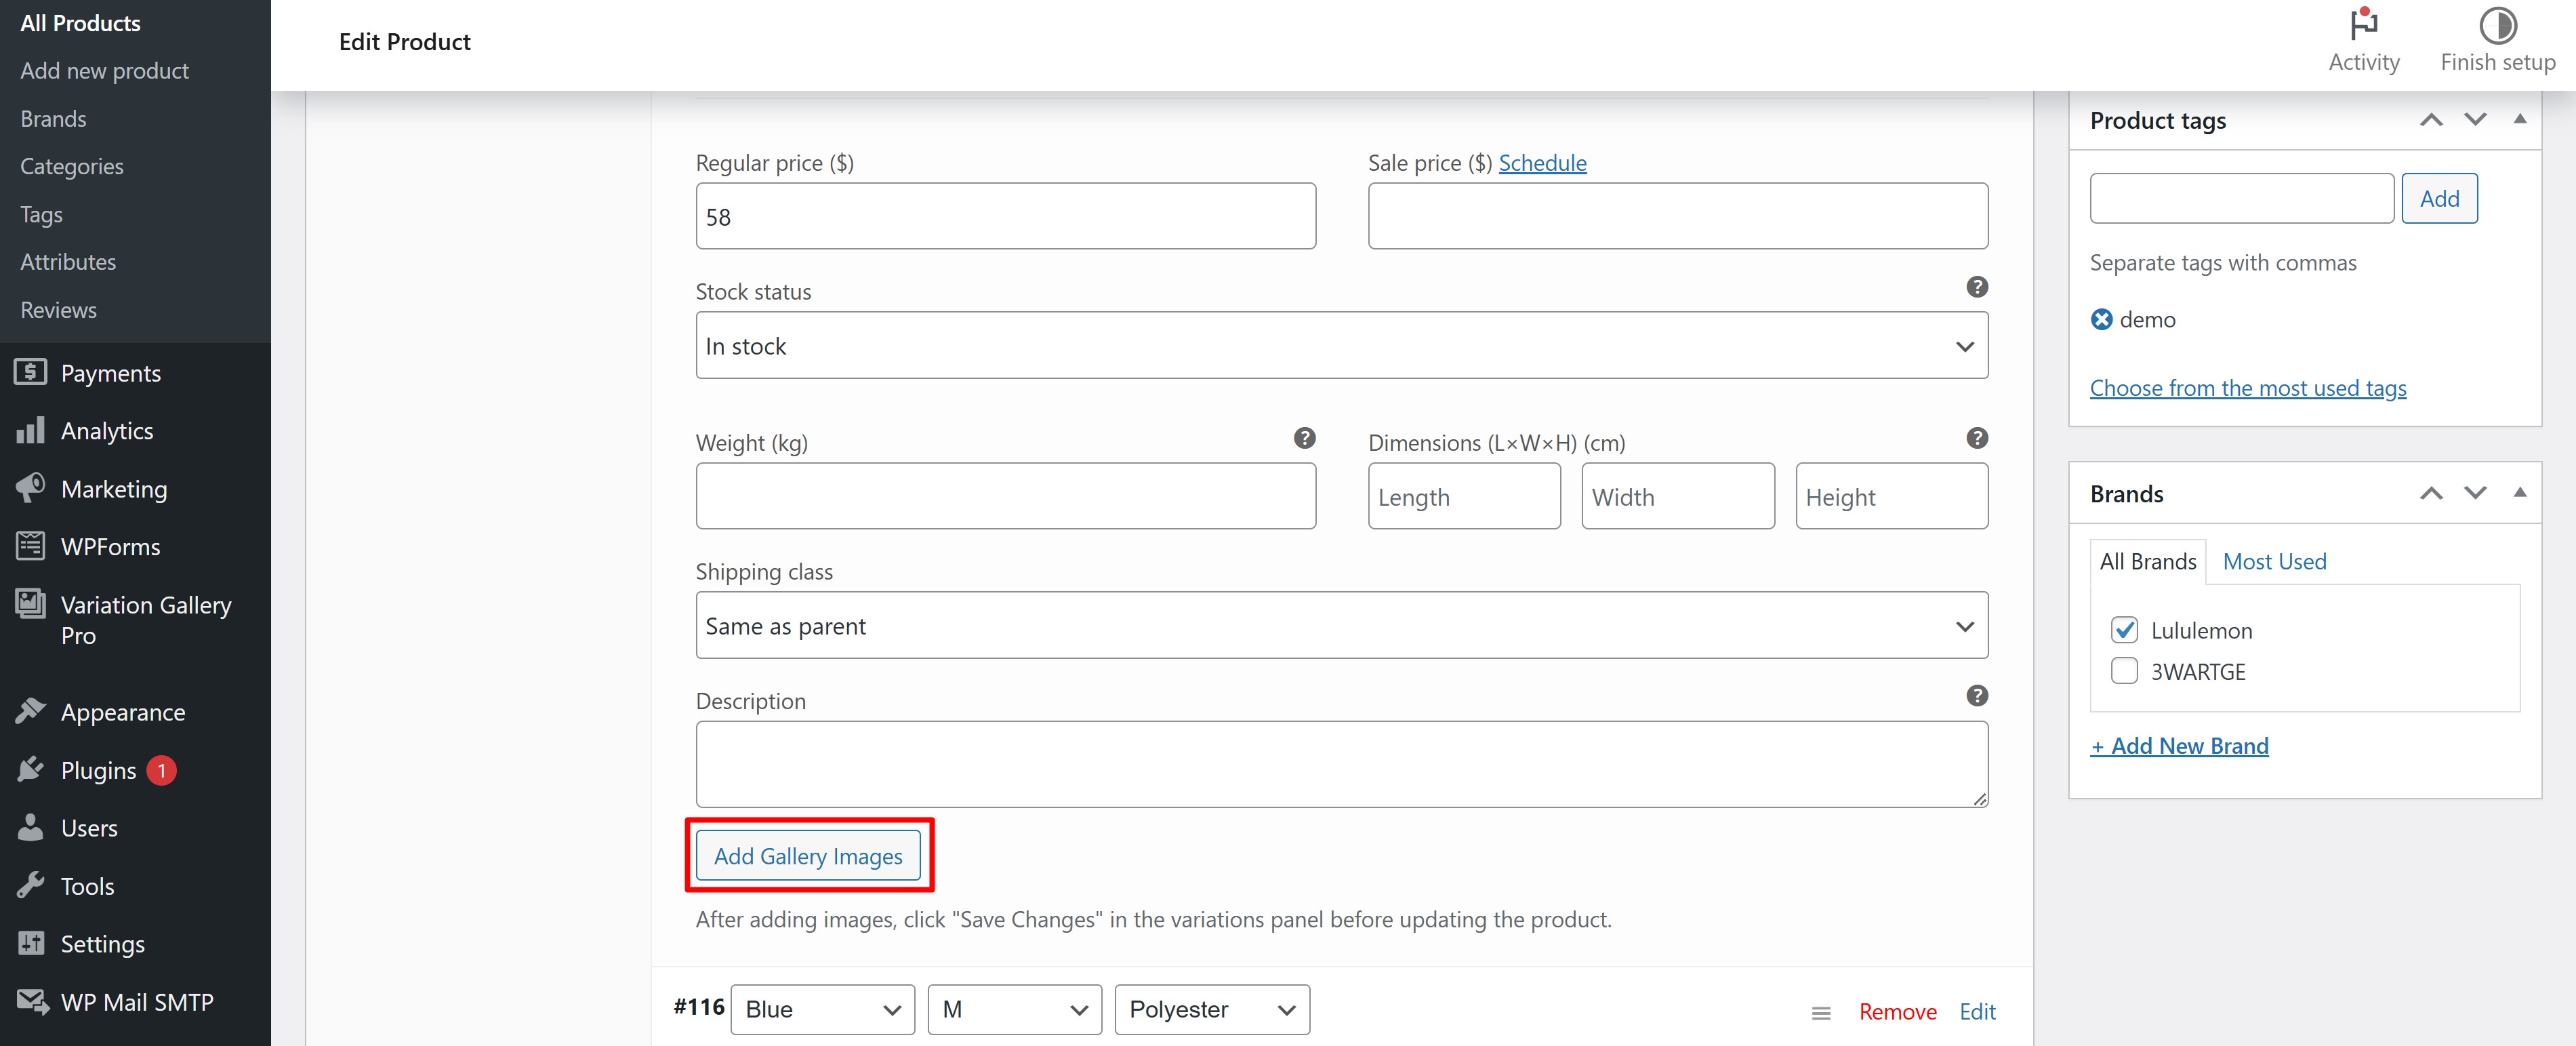
When uploading, you can specify multiple images at once, the uploaded images will appear above the Add Gallery Images button.
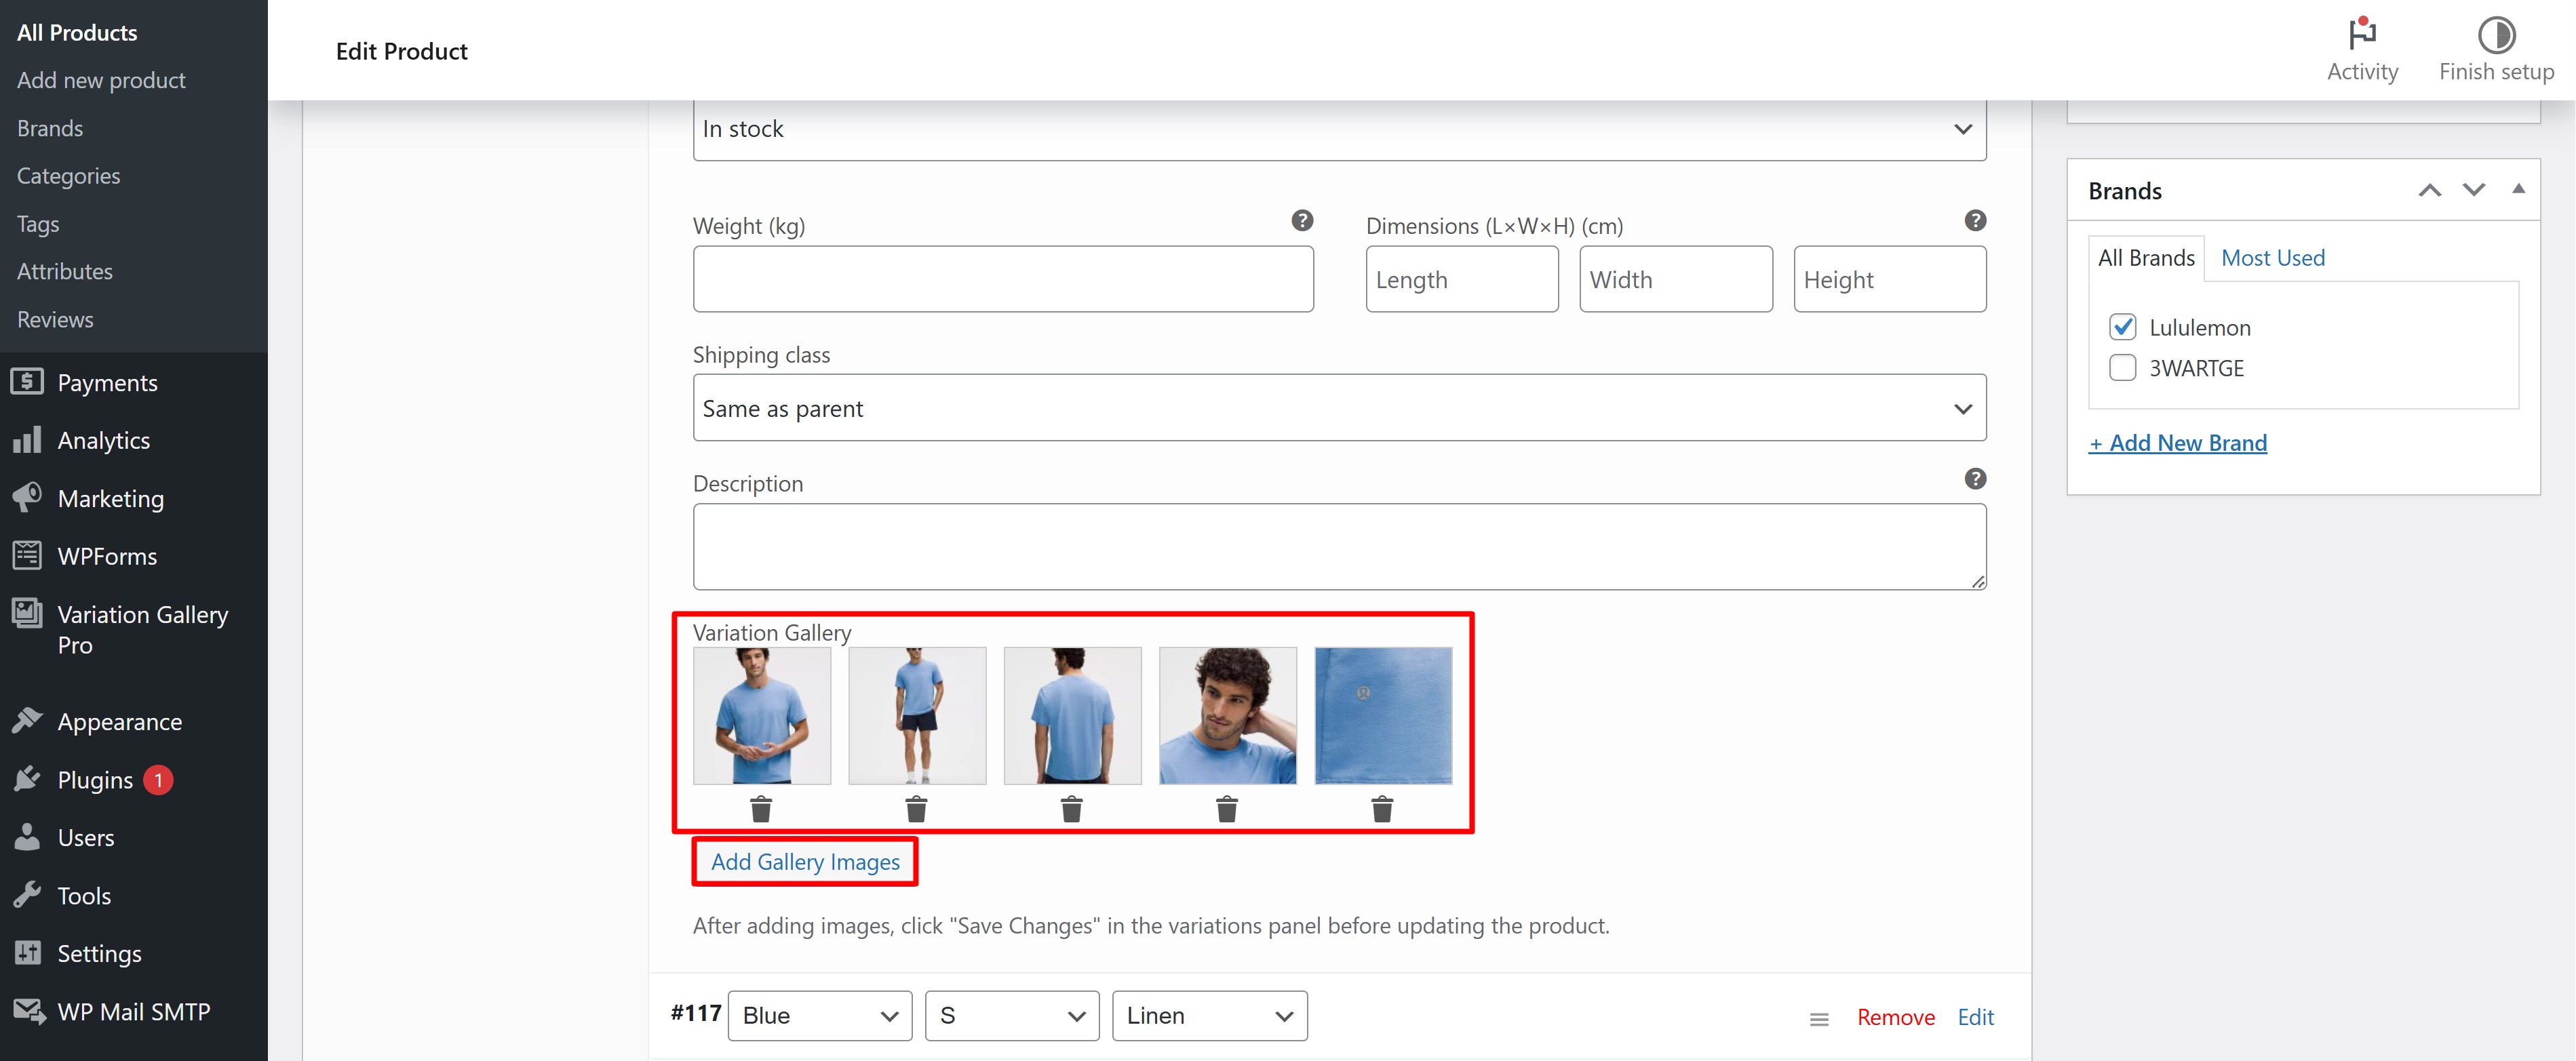
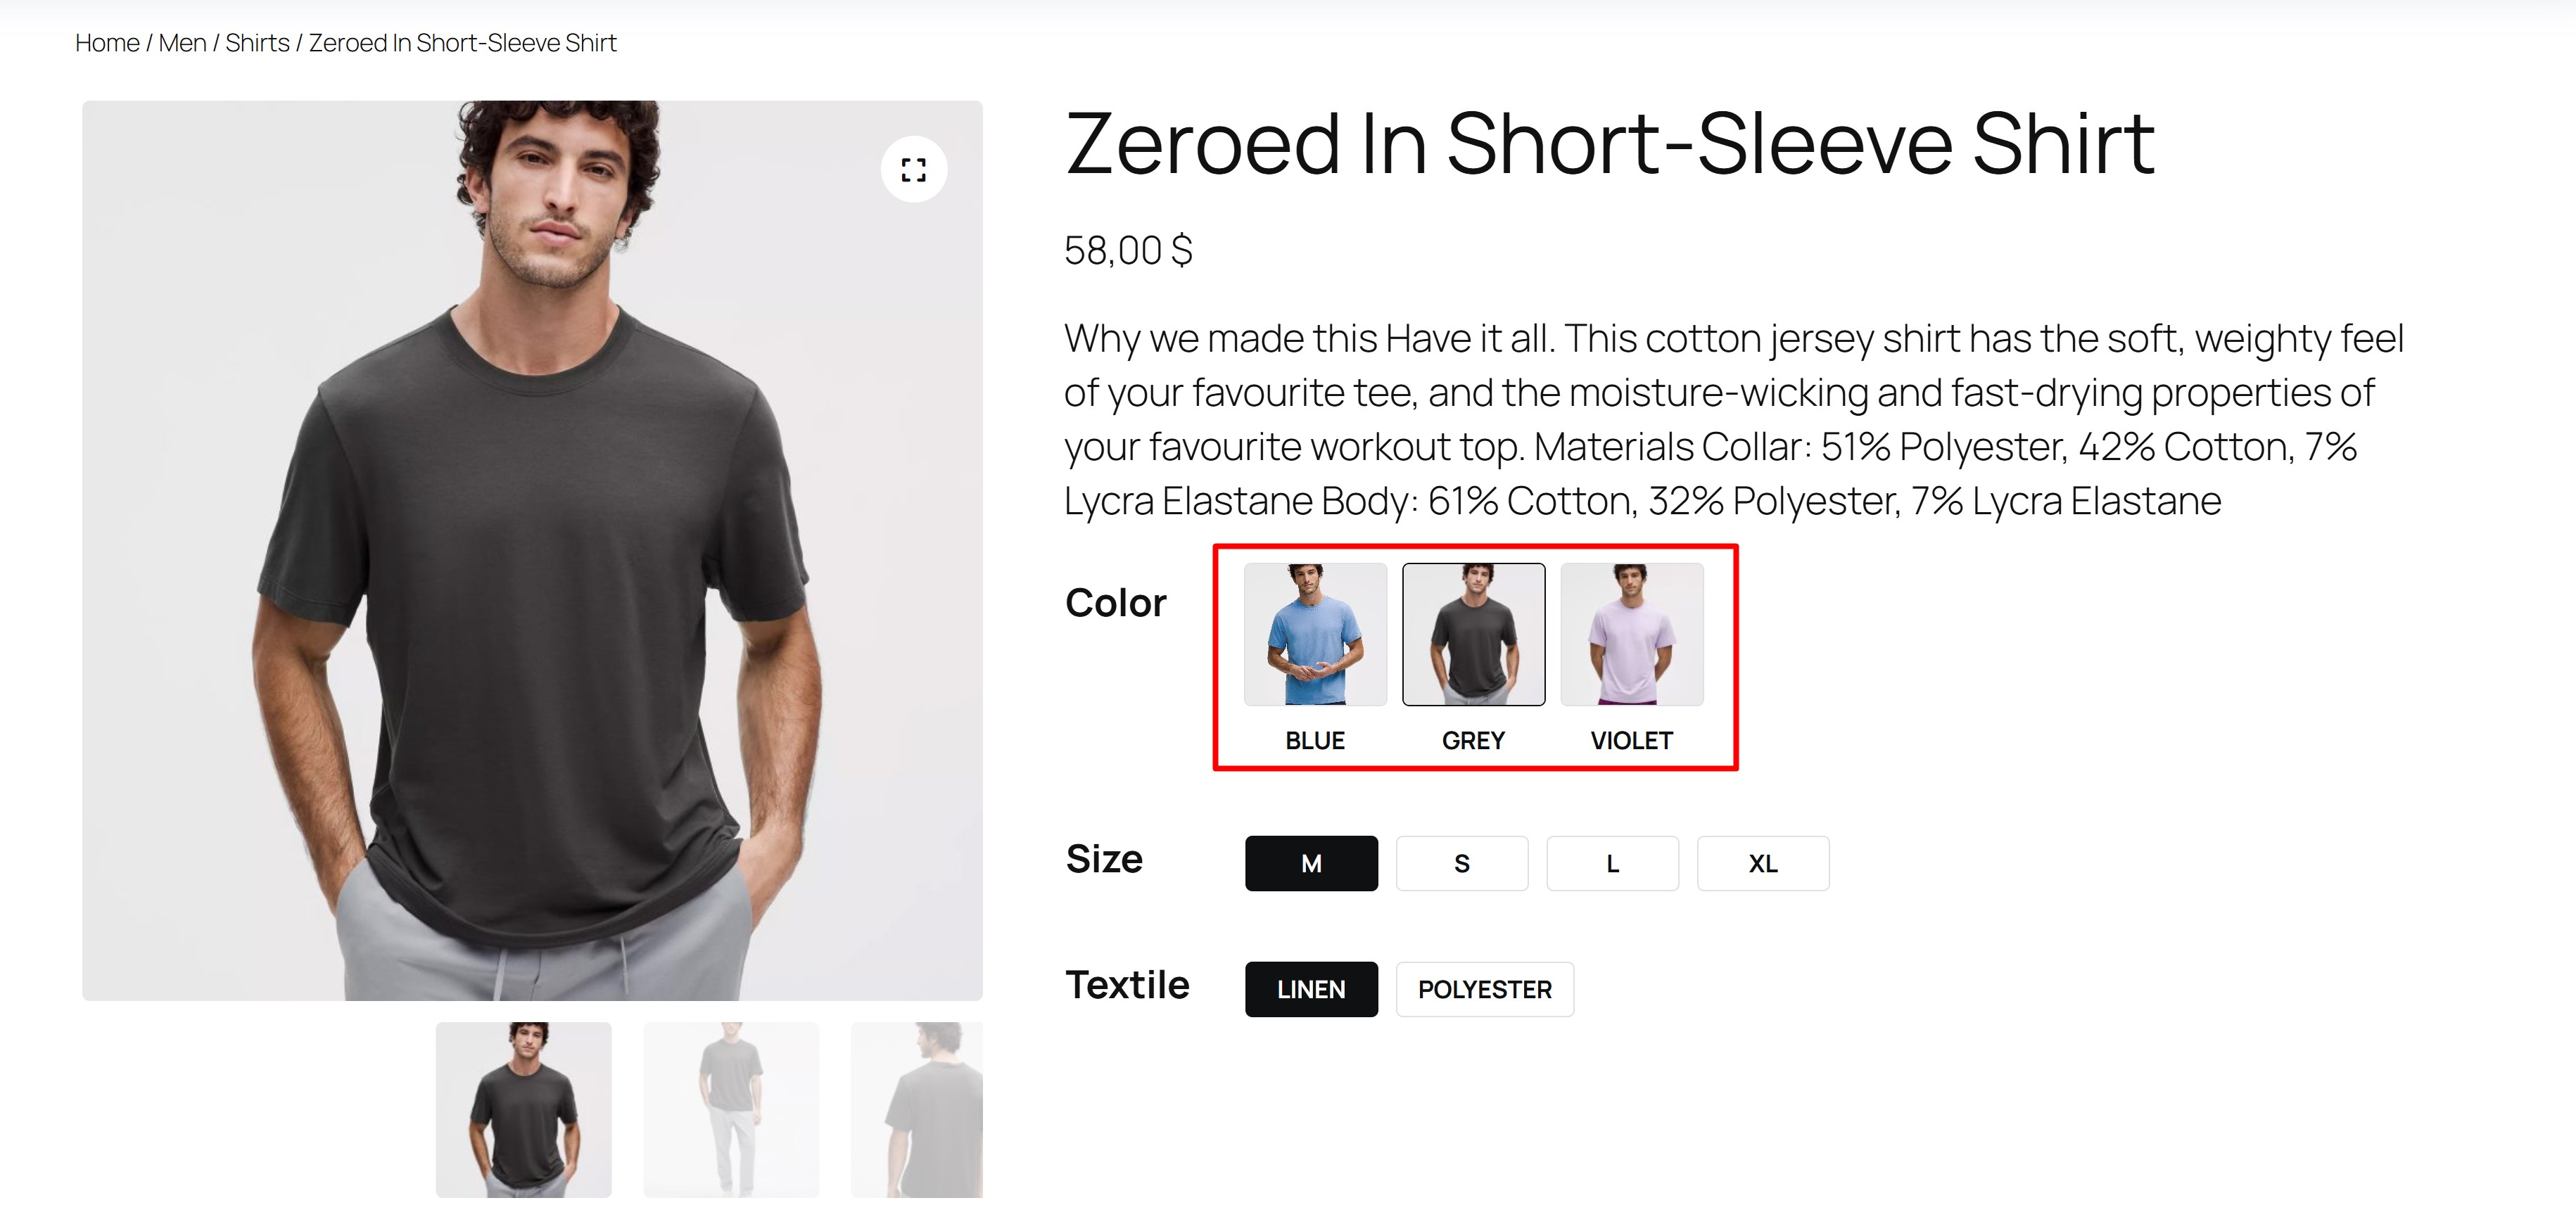
Also make sure that all the variations of Variable product have their own main image uploaded.
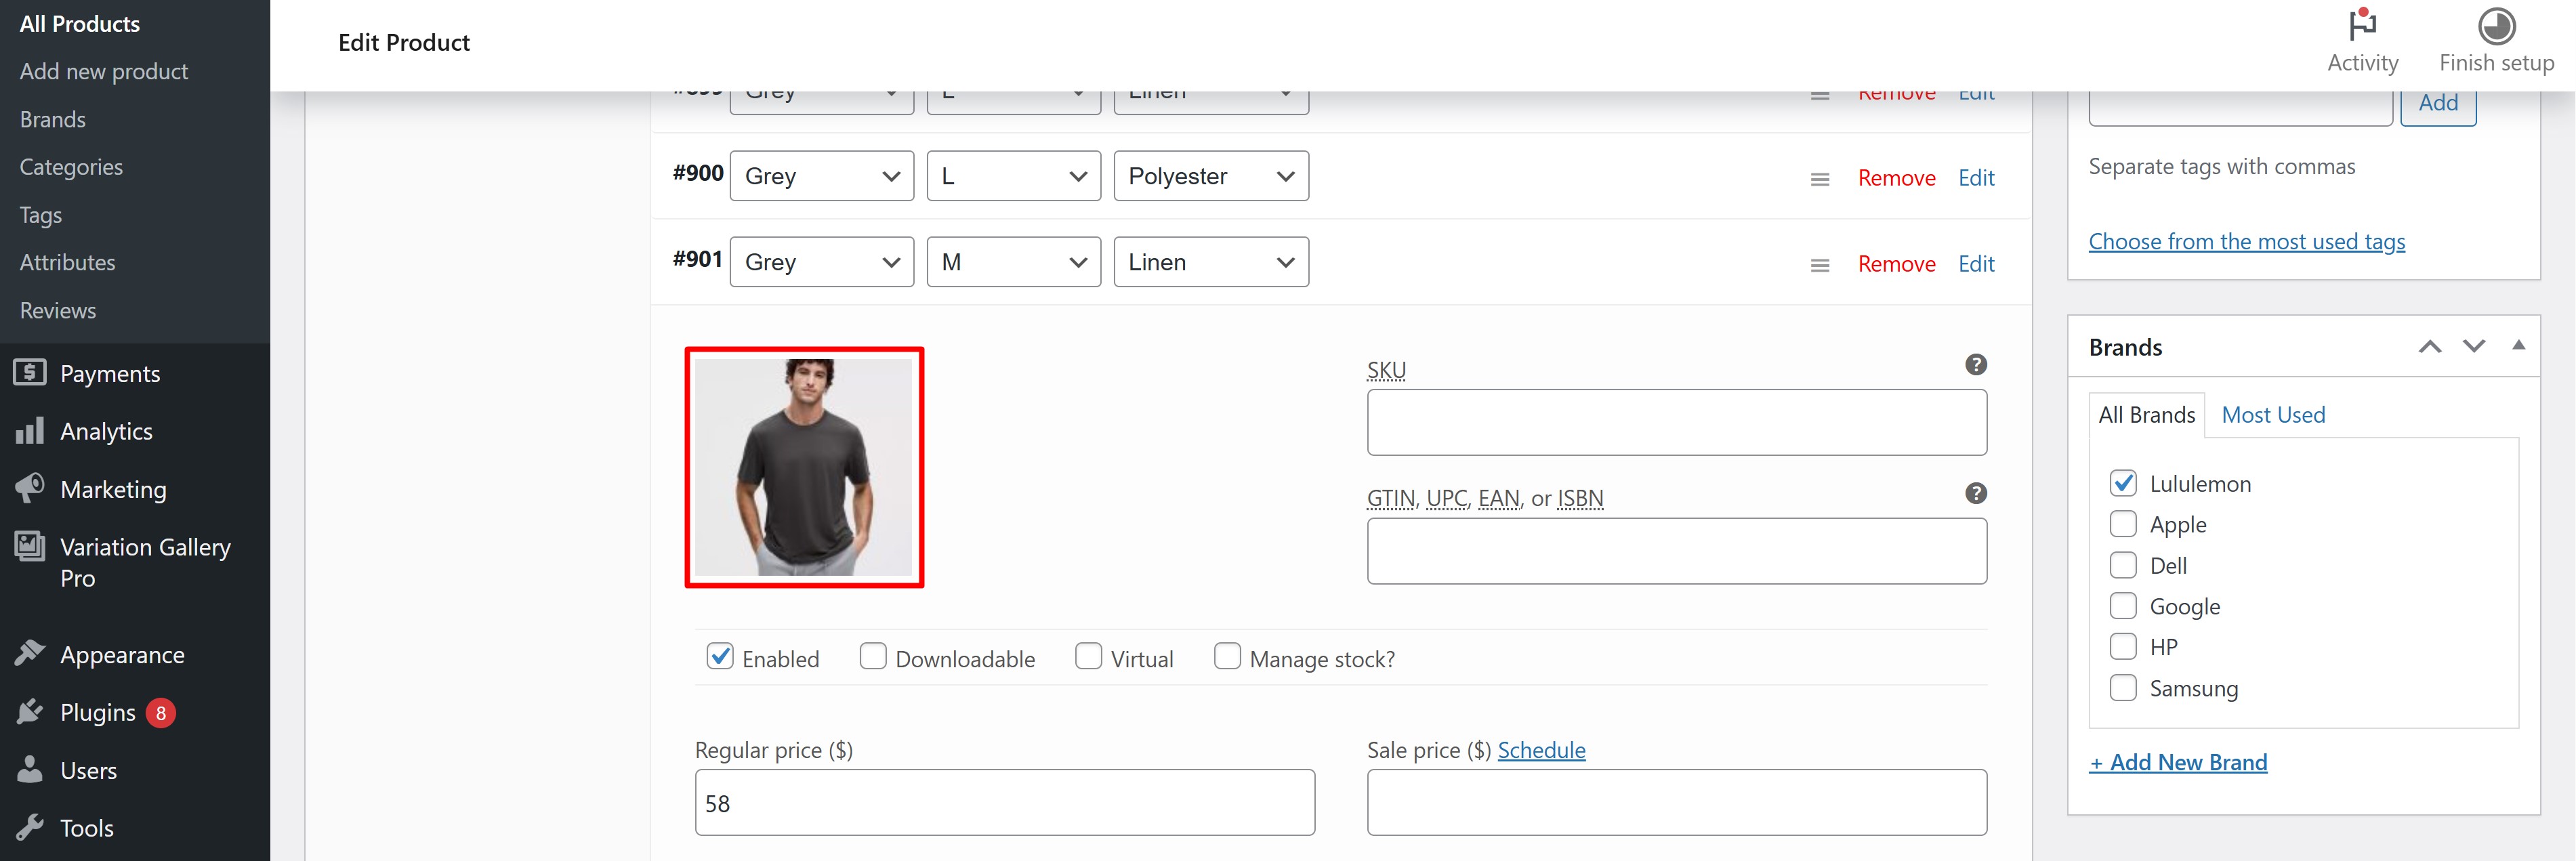
This is necessary so that the corresponding image appears in the labels.
If you have any questions about the plugin or need help after purchasing the plugin, please email us at: